> ## Documentation Index
> Fetch the complete documentation index at: https://docs.msportal.ai/llms.txt
> Use this file to discover all available pages before exploring further.
# Tenant Settings
> Configure organization-wide settings, custom domains, and branding
Tenant Settings controls organization-wide configuration including company details, custom domains, branding, and security options. Only Primary Admins can access these settings.
## Accessing Tenant Settings
1. Click **Settings** in the sidebar
2. Select the **Tenant** icon from the settings navigation
## Tenant Settings Overview
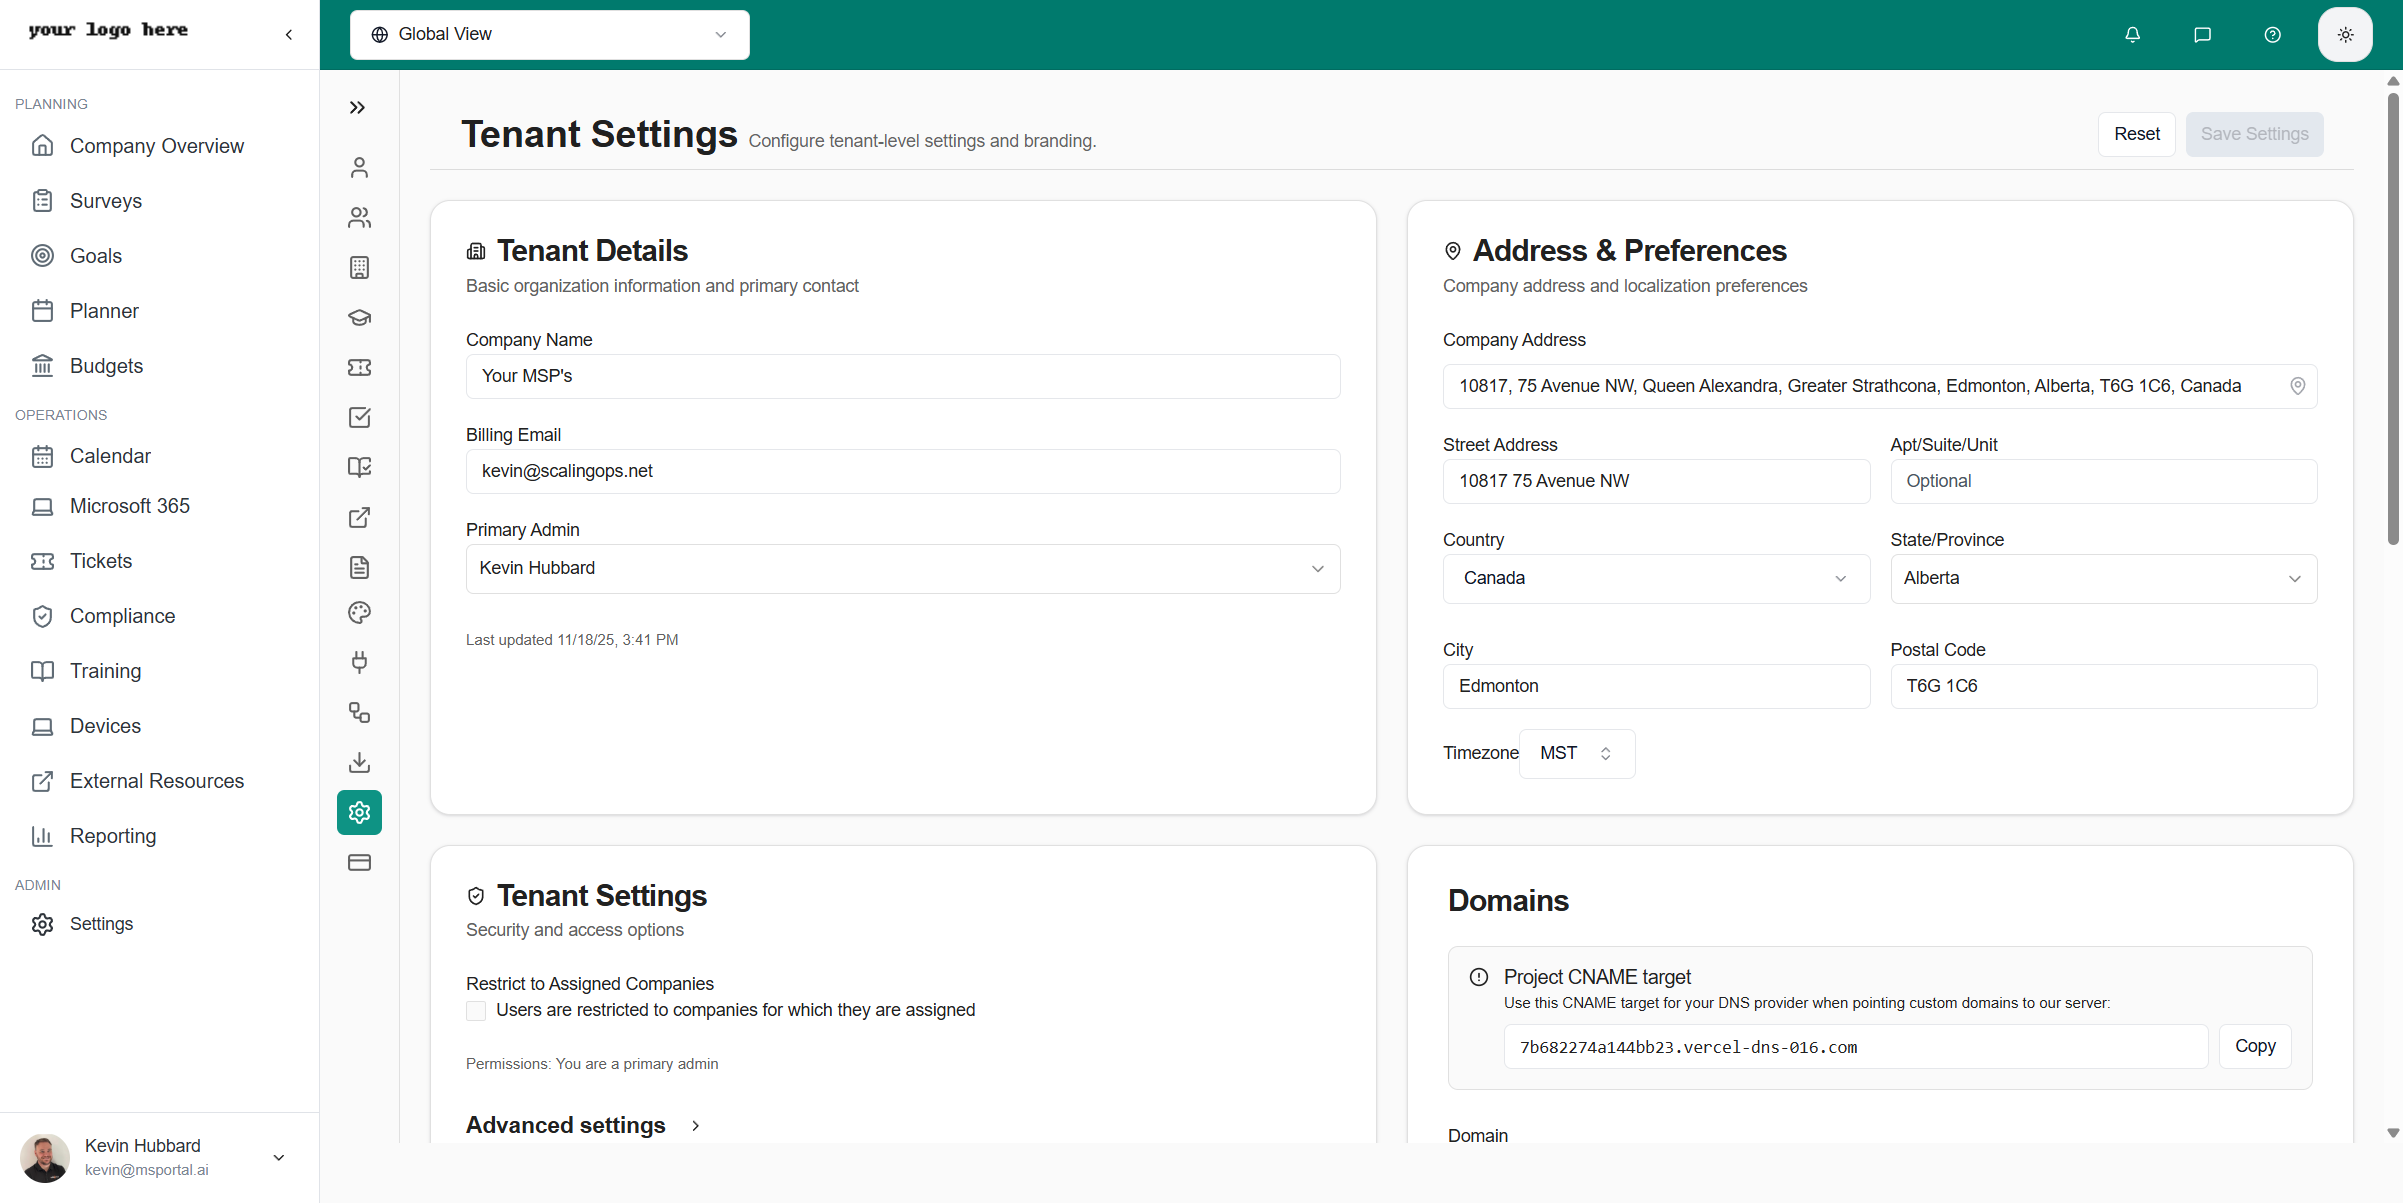 ## Tenant Details
Basic organization information:
| Field | Description |
| ----------------- | -------------------------------- |
| **Company Name** | Your organization's display name |
| **Billing Email** | Email for billing notifications |
| **Primary Admin** | Main administrator contact |
## Address & Preferences
### Company Address
* **Street Address** - Physical location
* **City, State/Province** - Location details
* **Postal Code** - ZIP or postal code
* **Country** - Country of operation
### Timezone
Select your organization's default timezone. This affects:
* Scheduled reports
* Meeting times
* Audit timestamps
* User default timezone
## Tenant Security Settings
### Restrict to Assigned Companies
When enabled:
* Users only see data for companies they're explicitly assigned to
* Improves data isolation between teams
* Requires company assignments in user management
Roles with **Bypass Company Restrictions** enabled will still have access to all companies.
### Advanced Settings
Additional security and configuration options for enterprise deployments.
## Custom Domains
Configure custom domains to access MSPortal with your own branding:
### Adding a Custom Domain
Type your custom domain (e.g., `portal.yourcompany.com`)
Copy the provided CNAME target value
Add a CNAME record with your DNS provider pointing to the target
Click **Re-check** to verify DNS propagation
Optionally mark as primary domain
### Domain Status
| Status | Meaning |
| ----------- | ------------------------------ |
| **Active** | Domain is verified and working |
| **Pending** | Waiting for DNS verification |
| **Error** | DNS configuration issue |
## Enhanced Branding
Customize your organization's branding:
### Brand Color
Set your primary brand color, used for buttons, links, sidebar highlights, and other branded UI across the app.
In the Branding card, open the **Colors** section.
Use the color picker or type a hex code into the input. Short hex values such as `#0e9` and full six-digit hex such as `#7c3aed` are both accepted.
Preview cards show how buttons, sidebar items, badges, and links will look in both light and dark themes. The dark-mode variant is generated automatically from your chosen color.
Click **Save** to apply. Your color takes effect immediately for every user in your tenant.
The **Reset** button restores the default MSPortal teal color. You will be prompted to confirm before reverting.
**Where the brand color appears:**
* Primary buttons and call-to-action buttons
* Links and link hover states
* Sidebar active item highlights
* Focus rings and selection highlights
* Chart primary color
* Status badges that use the brand scale
### Client Onboarding Portal Branding
Your brand color automatically applies to the public [client onboarding portal](/user-guides/client-onboarding/client-portal) as well. When a client opens their onboarding link, the portal uses your tenant's colors and logo so it feels like part of your brand, not a generic page. No separate configuration is needed.
### Logo Options
| Logo Type | Size | Used For |
| ------------------------ | -------- | ------------------------------ |
| **Primary Logo (Light)** | 140×32px | Expanded sidebar (light mode) |
| **Small Icon (Light)** | 32×32px | Collapsed sidebar (light mode) |
| **Primary Logo (Dark)** | 140×32px | Expanded sidebar (dark mode) |
| **Small Icon (Dark)** | 32×32px | Collapsed sidebar (dark mode) |
| **Favicon** | 32×32px | Browser tab icon |
| **Reporting Logo** | Varies | PDF reports and exports |
### Upload Guidelines
* **Format** - PNG or SVG recommended
* **Background** - Transparent backgrounds work best
* **Quality** - High resolution for crisp display
* **Theme-aware** - Upload separate light/dark versions
### Live Preview
Use the preview panel to see how your branding appears:
* **Desktop view** - Full sidebar with logo
* **Mobile view** - Collapsed icon view
## Best Practices
* **Complete all branding** - Upload all logo variants for consistent appearance
* **Test custom domains** - Verify domains work before sharing with users
* **Document settings** - Record configuration for disaster recovery
* **Review periodically** - Update branding when company details change
## Related Resources
* [Billing Settings](/user-guides/settings/billing) - Subscription management
* [Users & Roles](/user-guides/settings/users-roles) - User permissions
* [Settings Overview](/user-guides/settings/index) - All settings options
## Tenant Details
Basic organization information:
| Field | Description |
| ----------------- | -------------------------------- |
| **Company Name** | Your organization's display name |
| **Billing Email** | Email for billing notifications |
| **Primary Admin** | Main administrator contact |
## Address & Preferences
### Company Address
* **Street Address** - Physical location
* **City, State/Province** - Location details
* **Postal Code** - ZIP or postal code
* **Country** - Country of operation
### Timezone
Select your organization's default timezone. This affects:
* Scheduled reports
* Meeting times
* Audit timestamps
* User default timezone
## Tenant Security Settings
### Restrict to Assigned Companies
When enabled:
* Users only see data for companies they're explicitly assigned to
* Improves data isolation between teams
* Requires company assignments in user management
Roles with **Bypass Company Restrictions** enabled will still have access to all companies.
### Advanced Settings
Additional security and configuration options for enterprise deployments.
## Custom Domains
Configure custom domains to access MSPortal with your own branding:
### Adding a Custom Domain
Type your custom domain (e.g., `portal.yourcompany.com`)
Copy the provided CNAME target value
Add a CNAME record with your DNS provider pointing to the target
Click **Re-check** to verify DNS propagation
Optionally mark as primary domain
### Domain Status
| Status | Meaning |
| ----------- | ------------------------------ |
| **Active** | Domain is verified and working |
| **Pending** | Waiting for DNS verification |
| **Error** | DNS configuration issue |
## Enhanced Branding
Customize your organization's branding:
### Brand Color
Set your primary brand color, used for buttons, links, sidebar highlights, and other branded UI across the app.
In the Branding card, open the **Colors** section.
Use the color picker or type a hex code into the input. Short hex values such as `#0e9` and full six-digit hex such as `#7c3aed` are both accepted.
Preview cards show how buttons, sidebar items, badges, and links will look in both light and dark themes. The dark-mode variant is generated automatically from your chosen color.
Click **Save** to apply. Your color takes effect immediately for every user in your tenant.
The **Reset** button restores the default MSPortal teal color. You will be prompted to confirm before reverting.
**Where the brand color appears:**
* Primary buttons and call-to-action buttons
* Links and link hover states
* Sidebar active item highlights
* Focus rings and selection highlights
* Chart primary color
* Status badges that use the brand scale
### Client Onboarding Portal Branding
Your brand color automatically applies to the public [client onboarding portal](/user-guides/client-onboarding/client-portal) as well. When a client opens their onboarding link, the portal uses your tenant's colors and logo so it feels like part of your brand, not a generic page. No separate configuration is needed.
### Logo Options
| Logo Type | Size | Used For |
| ------------------------ | -------- | ------------------------------ |
| **Primary Logo (Light)** | 140×32px | Expanded sidebar (light mode) |
| **Small Icon (Light)** | 32×32px | Collapsed sidebar (light mode) |
| **Primary Logo (Dark)** | 140×32px | Expanded sidebar (dark mode) |
| **Small Icon (Dark)** | 32×32px | Collapsed sidebar (dark mode) |
| **Favicon** | 32×32px | Browser tab icon |
| **Reporting Logo** | Varies | PDF reports and exports |
### Upload Guidelines
* **Format** - PNG or SVG recommended
* **Background** - Transparent backgrounds work best
* **Quality** - High resolution for crisp display
* **Theme-aware** - Upload separate light/dark versions
### Live Preview
Use the preview panel to see how your branding appears:
* **Desktop view** - Full sidebar with logo
* **Mobile view** - Collapsed icon view
## Best Practices
* **Complete all branding** - Upload all logo variants for consistent appearance
* **Test custom domains** - Verify domains work before sharing with users
* **Document settings** - Record configuration for disaster recovery
* **Review periodically** - Update branding when company details change
## Related Resources
* [Billing Settings](/user-guides/settings/billing) - Subscription management
* [Users & Roles](/user-guides/settings/users-roles) - User permissions
* [Settings Overview](/user-guides/settings/index) - All settings options