

Import or match companies inside an integration
Open a connection from Settings > Integrations, then select Import or match companies. The same task opens inline in Launch Center. The task label stays the same across providers; the workspace identifies the source records as companies, sites, organizations or the provider’s equivalent.- The workspace opens on Import, showing records that are not yet linked, including records with suggested matches. Use Suggested when you want to review proposed links, or Matched and Ignored to revisit those records. Review the source records and search before importing. If a portal company already exists under a different name, choose that company or review and accept a suggested match.
- Select Import beside a source record to open the import dialog with that record selected. For a batch, select Import companies and choose records in the dialog.
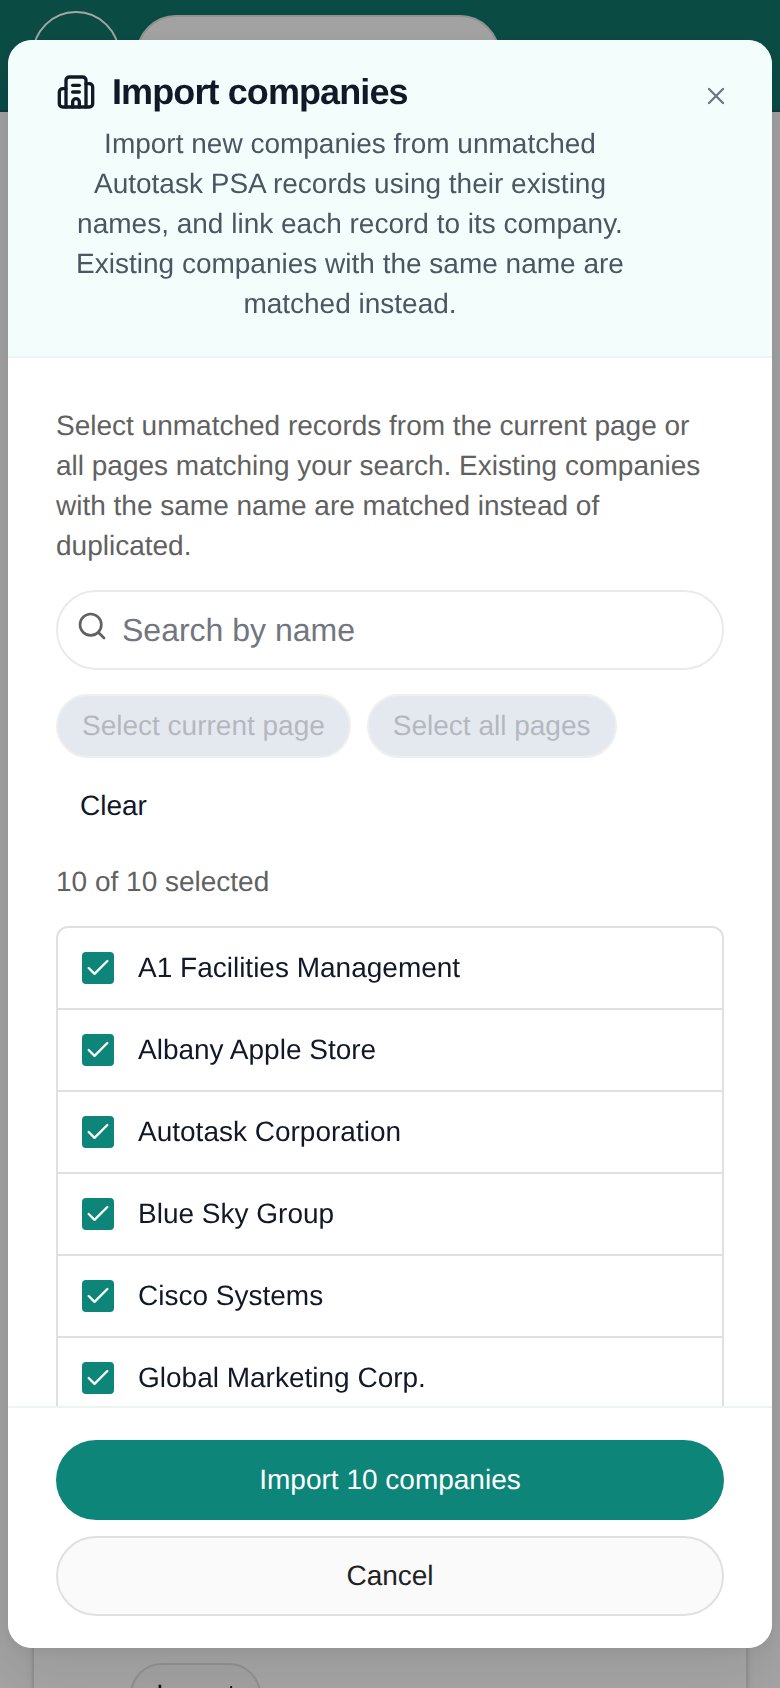
- Review the names and selection count. The dialog loads unmatched records across provider pages for the current search, then displays up to 50 per page. Use Select current page for the displayed page or Select all pages for all records matching the dialog search. Previous and Next move between pages; Clear removes the selection. Records with suggested matches are included. Review the suggested destination before deciding whether to import or match an existing company.
- Confirm with the dialog’s Import button, which includes the selected company count (for example, Import 3 companies). Import creates missing portal companies and links the source records. Existing companies with the same name are matched instead of duplicated.
- Read the result and verify the company links before importing users or devices. Importing or matching at least one company opens the related tasks for that company; you can leave other companies for later and return whenever you need more users or devices. For a partial result, review the remaining records and any companies already created before retrying.
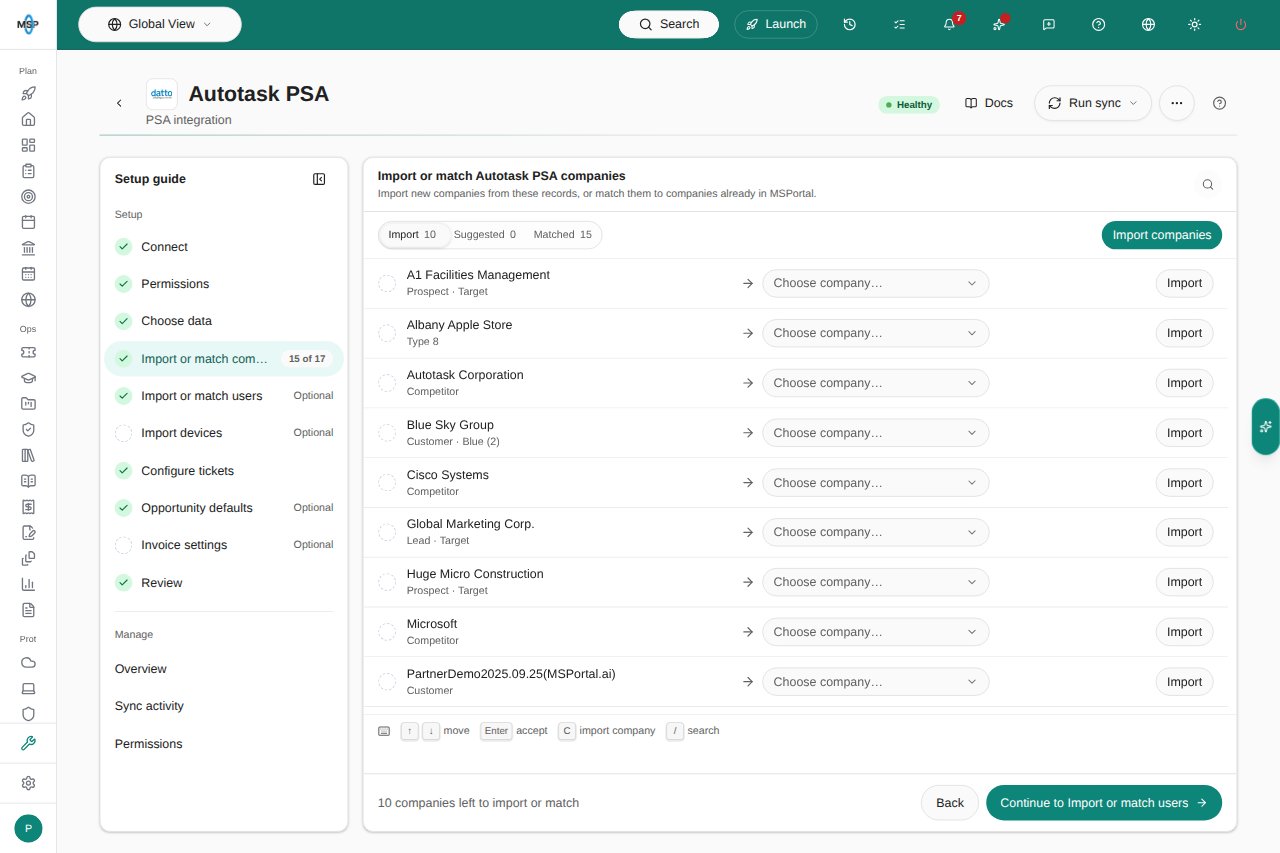
Import opens first; remaining companies do not block users or devices for companies already connected.
- Desktop
- Phone
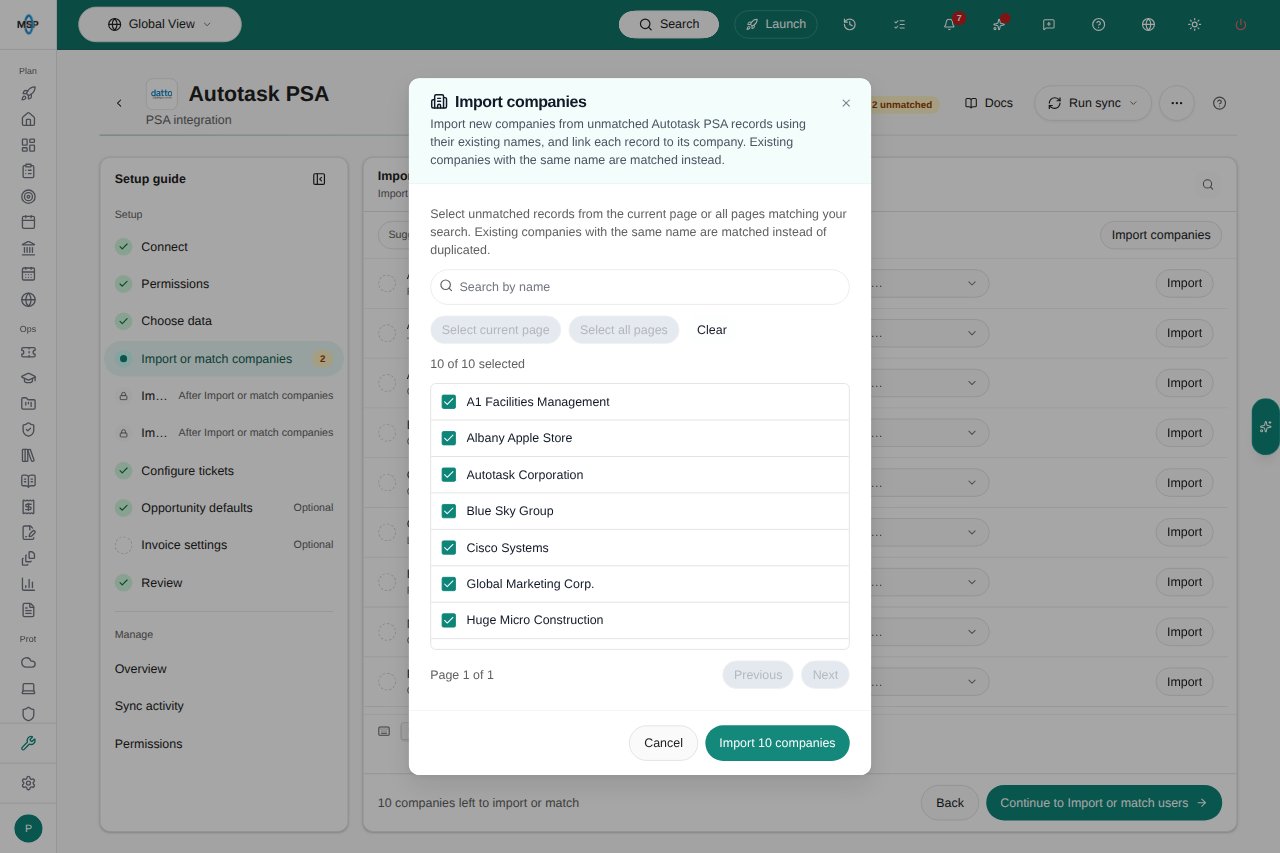
Review the company selection before confirming an Autotask import.
Separate Companies import screen
The sections below describe Settings > Companies > Import. That separate workflow stages links and applies them through Import Selected; its selection and save behavior differs from the connection-page dialog above.Prerequisites
- You must have at least one PSA integration configured (ConnectWise Manage, Autotask, HaloPSA, or Syncro)
- You must have appropriate permissions to manage companies
Steps to Import Companies
Quick Match, bulk Assign, filter counts and Clear Filters share one toolbar. Searching keeps the table header in place. The rows fill the dialog above its footer, and pagination stays visible when a search has no matches. On a phone, open Filters to search.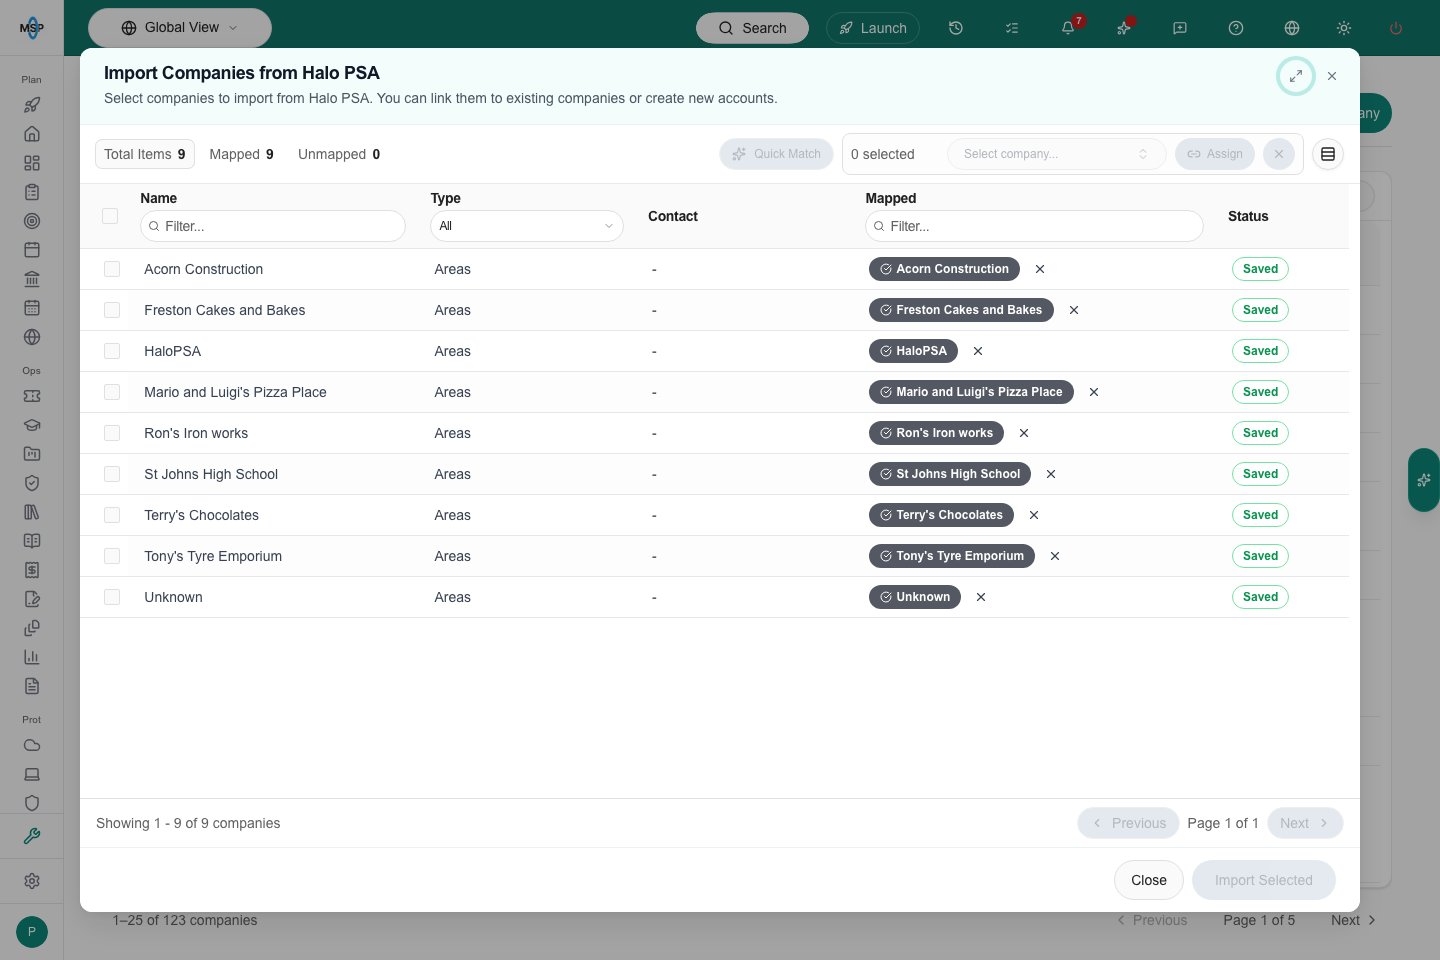
Company imports use one toolbar and fill the dialog above the footer.
1
Navigate to Companies
- Log in to your MSPortal.ai account at https://app.msportal.ai
- Go to Settings > Companies
2
Access the Import Menu
- On the Companies page, click the Import button
- The import menu lists every configured integration for your account. Choose Import from your PSA (for example, Import from ConnectWise Manage).
- You’ll see a list of all available companies from your PSA system
- The list shows companies from the last sync with your PSA. If a company is missing, check the integration’s sync status and company filters, then use the dialog’s sync option to refresh the list.
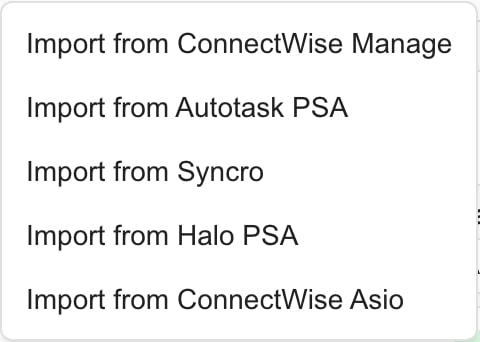
The Import menu lists your configured integrations.

3
Select Companies to Import
- Review the list of available companies from your PSA
- Check the checkbox next to each company you want to import
- You can select multiple companies at once
- Use the search or filter options to find specific companies
- Instead of importing as new, you can also:
- Link a PSA company to an existing MSPortal company using the Select company… dropdown in its row
- Click Quick Match to automatically propose links to existing companies based on name similarity, then review and apply the matches
- Choose Create new company in the dropdown to create and map a company on the spot
Create new company saves the new company as soon as you click Create & Map. Its link to the PSA company is saved when you click Import Selected. Closing the dialog does not remove a company you already created.
4
Import Selected Companies
- After selecting your desired companies, click the Import Selected button
- The button shows the count of selected companies and pending links (for example, “Import Selected (2)”)
- The import process will begin automatically

5
Verify Import Success
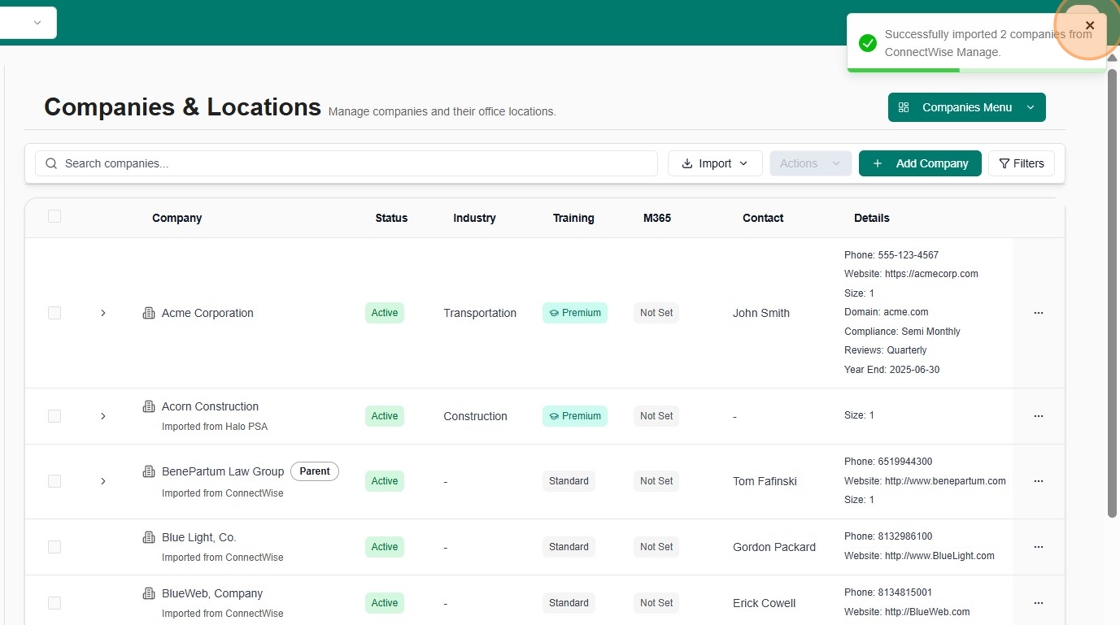
- Once the import is complete, you’ll see a confirmation message
- The imported companies will now appear in your Companies list
- You can click on any imported company to view and manage its details
Important Notes
- Data Sync: Imported companies maintain a connection to your PSA system for ongoing synchronization
- Duplicate Prevention: MSPortal.ai automatically prevents duplicate company imports. If a company already exists, link it with Select company… instead of creating a new one.
- Bulk Operations: You can import multiple companies at once to save time
- Updates: Company data can be refreshed from your PSA at any time using the sync features
- Removing a link: Removing a saved link with its unlink control takes effect immediately. Clearing a pending link only removes the unsaved suggestion.
Troubleshooting
If you don’t see any companies available for import:- Verify your integration is properly configured and connected
- Check that you have the necessary permissions in both MSPortal.ai and your PSA system
- Ensure your PSA contains active company records
Next Steps
After importing companies, you can:- Configure company-specific settings
- Import users associated with each company
- Set up company-specific compliance requirements
- Configure billing and budget settings
Frequently asked questions
Does opening company import fetch every company live from the PSA?
Does opening company import fetch every company live from the PSA?
No. It reads synchronized provider records; inspect sync status and source filters when data is missing.
Does Create new company in the separate Companies import screen wait until Import Selected?
Does Create new company in the separate Companies import screen wait until Import Selected?
No. In that separate workflow, confirming creation saves the company immediately and stages its source link. The connection-page Import dialog instead imports and links its selected records when you confirm.
Does removing a saved company link wait for a final Save?
Does removing a saved company link wait for a final Save?
No. The saved-link removal action persists immediately.
Should I create another company after its link fails?
Should I create another company after its link fails?
No. Inspect and reuse the company that was already created before retrying the link.