

Supported Integrations
MSPortal.ai supports importing users from the following integrations:Prerequisites
- At least one integration must be configured and active
- User roles must be created in MSPortal.ai
- You must have the Manage Users permission
Import Users from Settings
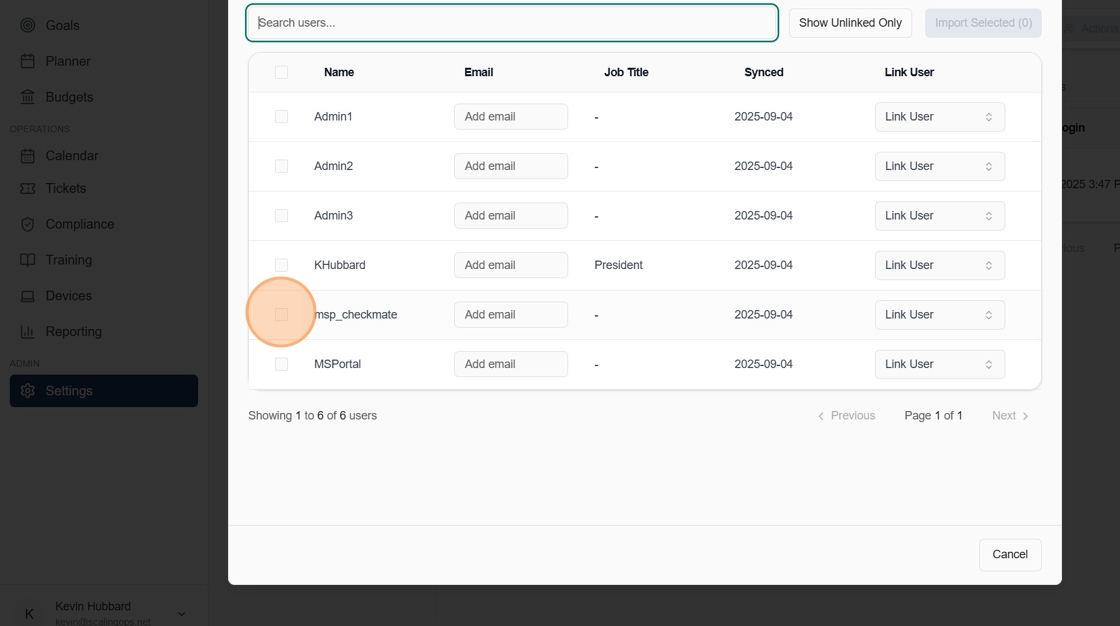
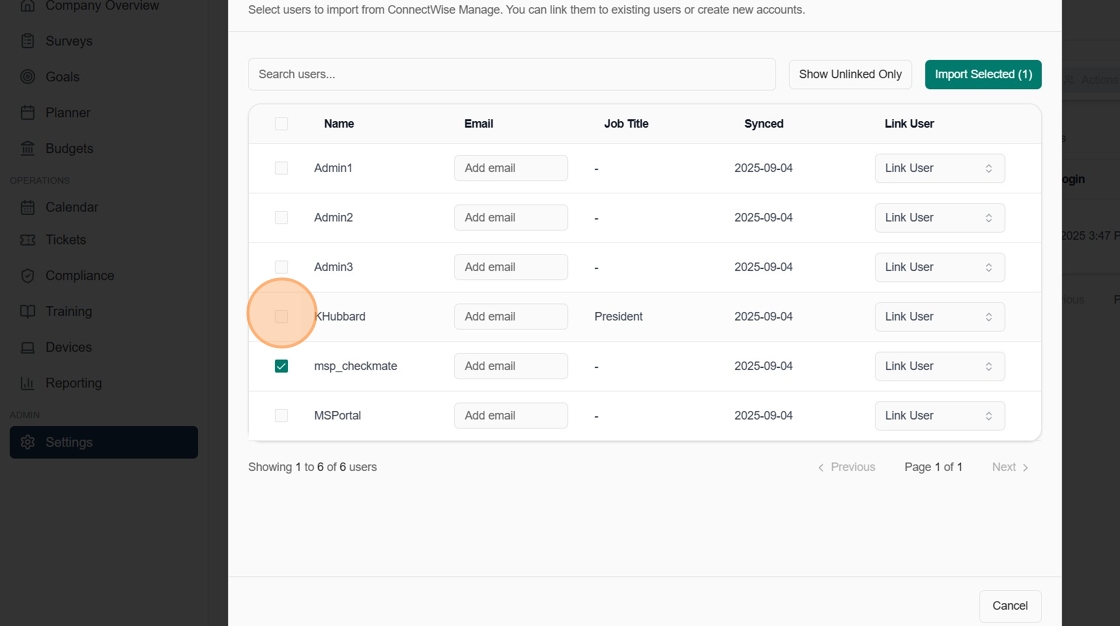
Filter counts and Clear Filters share the toolbar with Quick Match and Role. Searching keeps the table in place. The rows fill the dialog above its footer; on a phone, open Filters to search and clear filters.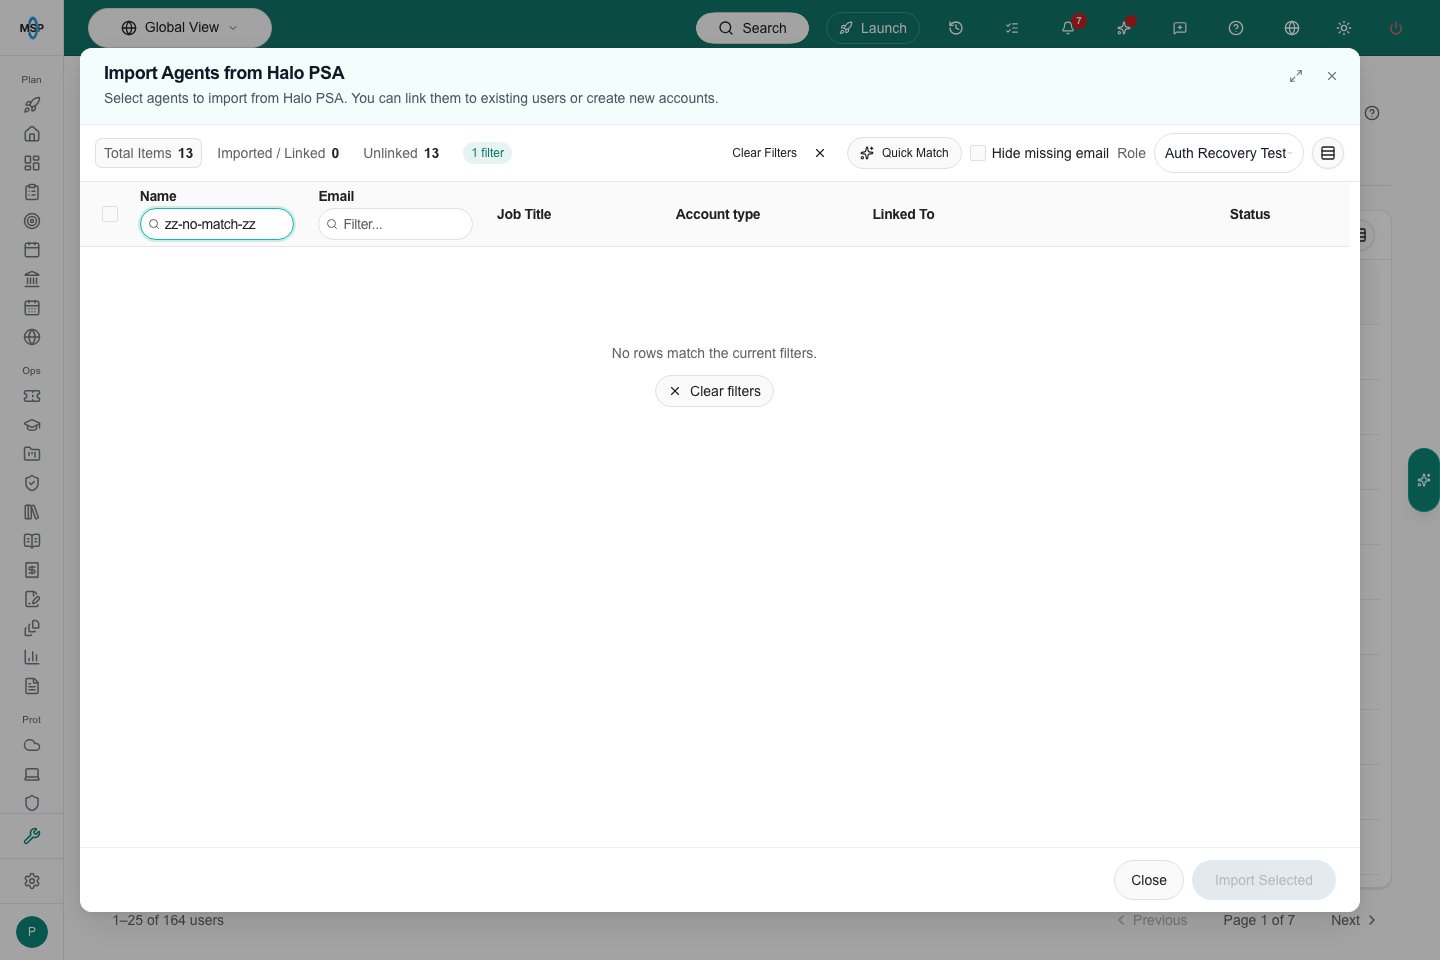
Searching staff users keeps the existing toolbar and footer in place.
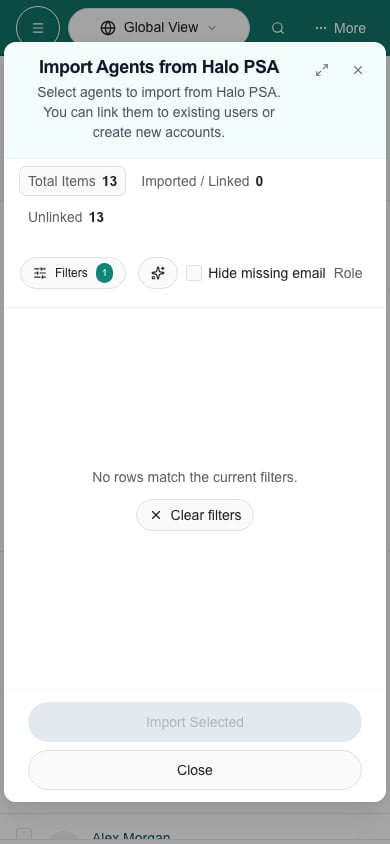
The phone import dialog keeps its filters and footer reachable.
Navigate to Users & Roles Settings

Open Import Dialog
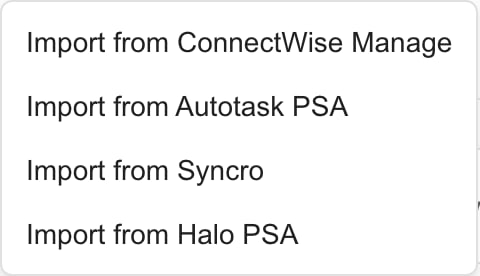
Choose a PSA from the Import menu on the Users tab.

Review Available Users
- Name - The user’s name in the source system
- Email - Email address (editable if missing)
- Job Title - Job title (if available)
- Linked To - The MSPortal.ai user this record is linked to, or a combobox to link one
- Status - Whether the user is imported, linked, or pending
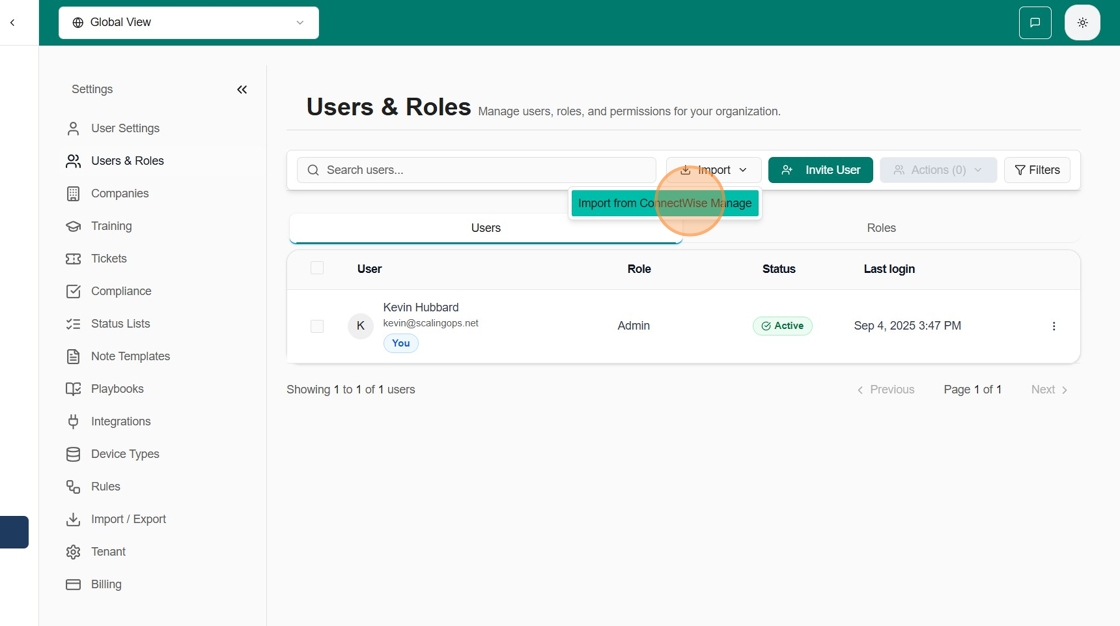
Select Users to Import
- Clicking individual checkboxes to select users one by one
- Using the header checkbox to select all unlinked users
- Using the search box to filter users by name or email
Link to Existing Users (Optional)
- Find the user in the list
- Click the Link to user… combobox in the “Linked To” column
- Select the matching MSPortal.ai user
- This links the integration record to the existing account instead of creating a duplicate
Select a Role

Add Missing Email Addresses
- Find the user in the list (they’ll have an empty email input field)
- Enter their email address in the Email field
- The email will be saved with their MSPortal.ai account. It does not change the email in your PSA.

Complete the Import
- Review the number of selected users and pending links shown on the Import Selected button
- Click Import Selected
- Wait for the confirmation message. It reports how many users were imported, linked, skipped, or failed.
- Imported users will appear in your Users list
Import Company Users
Client contacts are imported as Company users, with a Company role.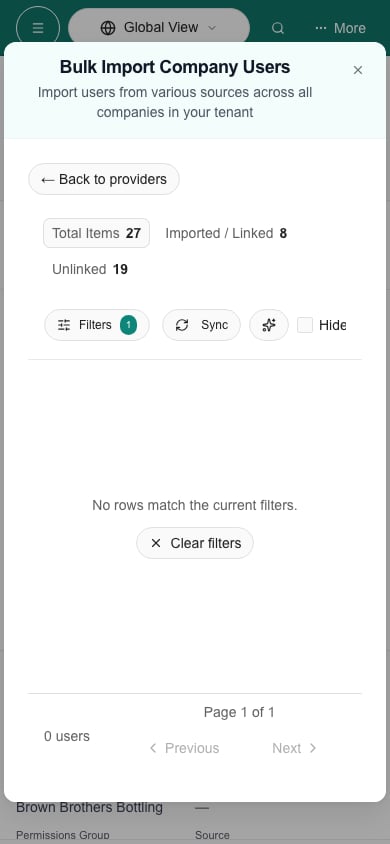
Company-user imports keep pagination visible when a search has no matches.
- Import and map the company first. See Import Companies.
- Go to Settings → Users & Roles → Company Users.
- Click Import and choose your PSA or Microsoft 365.
- Follow the same steps as above, choosing a Company role in the Role dropdown.
Import Microsoft 365 users automatically
To create Company users from Microsoft 365 without opening the import dialog, add an access rule with the action Import Microsoft 365 users. After each Microsoft 365 users sync, each matching person without a portal user becomes a Company user in their company, with the role the rule sets. No invitation is sent. Pausing or deleting the rule keeps the users it already imported, and each tenant’s import can be turned off on the Microsoft 365 Companies page. This is the Microsoft 365 counterpart of PSA Contact Auto-Import. For linked Company users, Microsoft 365 account status takes priority over PSA contact status. An enabled Microsoft 365 account can restore access after a recorded automatic disable; an explicit administrator disable or an access rule still prevents sign-in. Synchronization preserves established identity links when a contact email changes. Multiple existing login accounts are left for staff to review.Import or match PSA contacts in the connection page
Halo PSA, ConnectWise Manage, Autotask and Syncro offer Import or match users on their connection pages, and in Launch Center when it is embedded there. This imports Company users, not internal MSP staff.- Desktop
- Phone
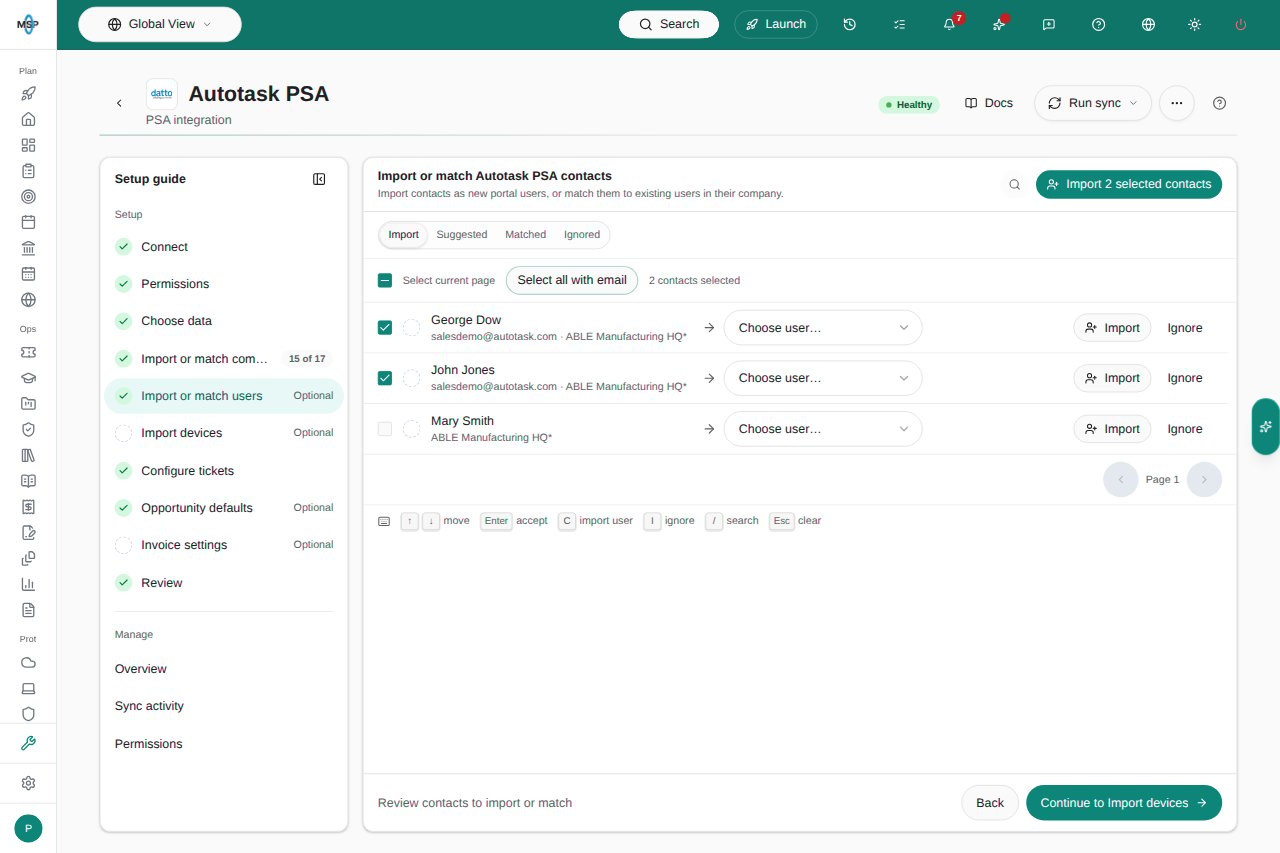
Import or match contacts directly in the Autotask connection page.
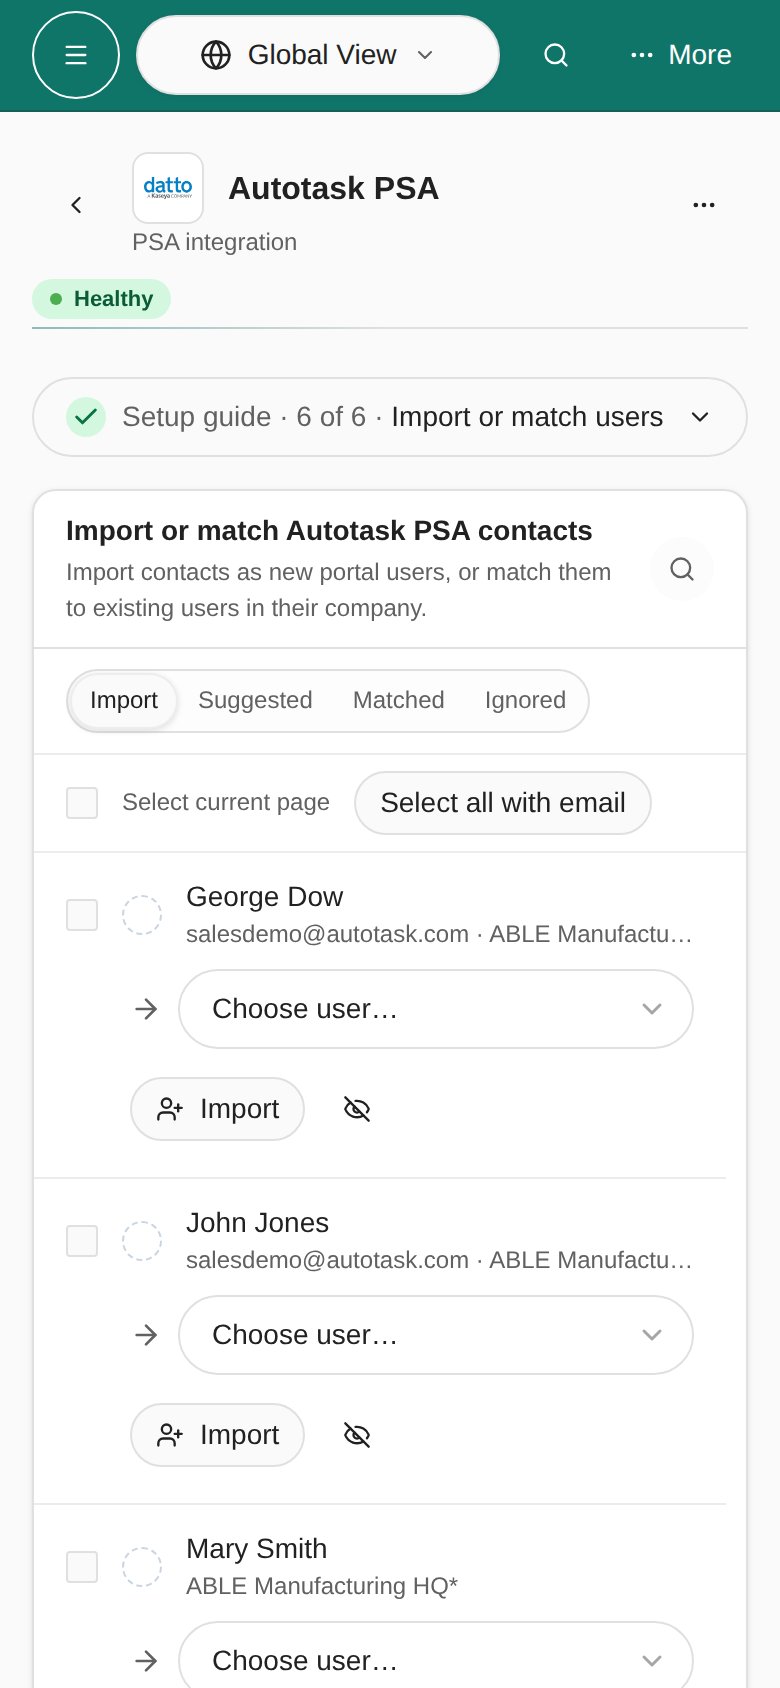
- Import or match at least one company, then open Import or match users in the intended PSA connection. Only contacts belonging to connected companies are available. You can return to import more users without importing or matching every company or contact.
- The workspace opens on Import, including contacts with suggested matches. Use Suggested to review proposed links, or Matched and Ignored to revisit those records. Search and filter the contacts. Select Import beside one contact, or tick multiple contacts and choose Import selected. The button includes the selected count when contacts are selected.
- Use the header checkbox to select the current page, click it again to select all pages matching the current filters, and click again to clear the selection. Use row checkboxes for individual contacts. Select all with email replaces the selection with contacts that have an email address across all pages matching the current filters, leaving out contacts with missing emails. Review the selection, then choose Import selected. Wait for the full selection to load and review its count before continuing. Large selections are processed in batches, so you do not need to import each page separately.
- In the review panel, check the ready-to-import and skipped counts. Contacts without an email address are skipped. You can add an address for an individual contact to include it; correct invalid addresses or clear them to skip those contacts, and resolve duplicate addresses. The review list has pages for large selections. Email edits are submitted with the portal import; they do not change the upstream PSA contact’s email.
- Choose the intended Company role in Role. Review its permissions, then confirm with the Import button showing the user count and role.
- Follow the processed/imported progress, then read the imported or matched and skipped results. Verify the actual users, company assignments and roles. A partial failure can leave some users imported; inspect the remaining contacts before retrying.
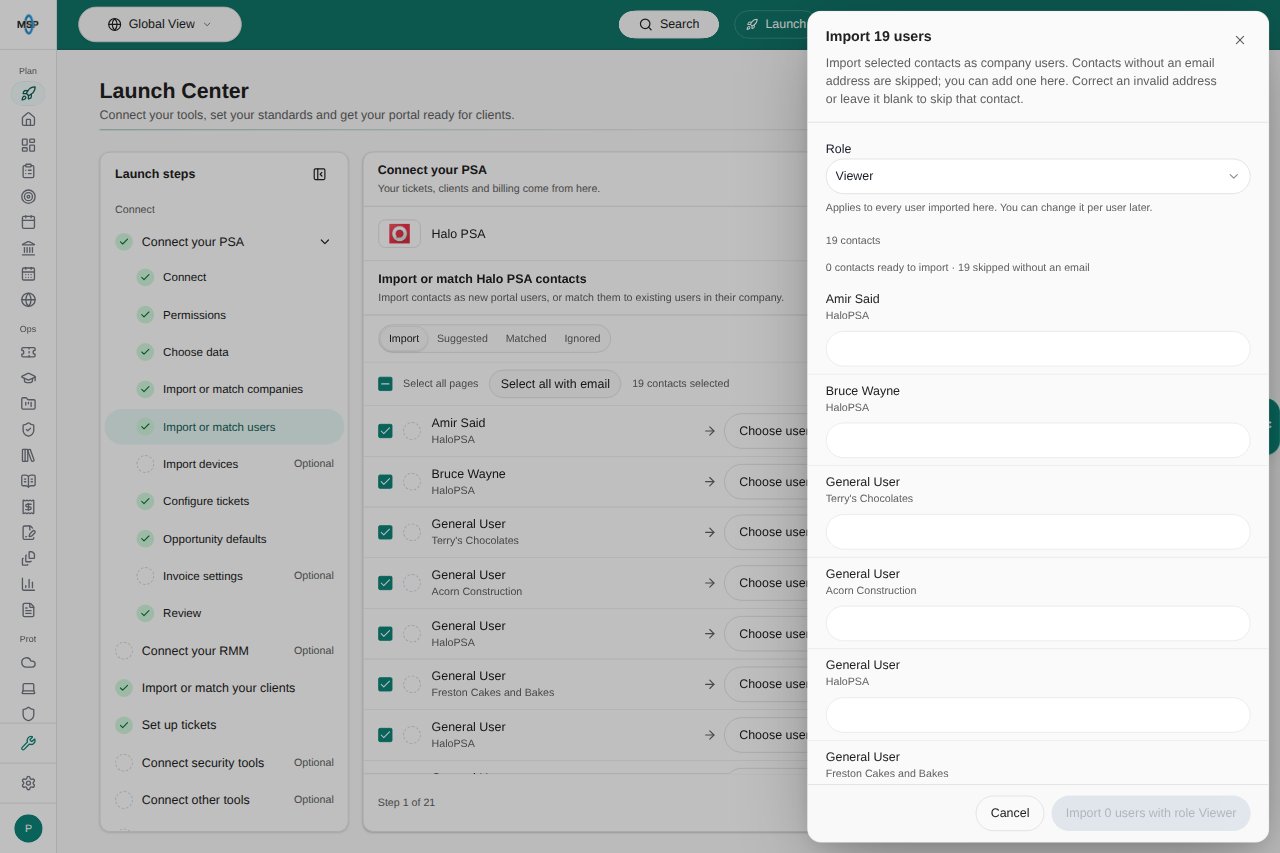
The Halo review panel inside Launch Center identifies contacts skipped for missing email addresses before import.
Post-Import Tasks
After importing users:- Verify roles: Confirm imported users have the correct roles and permissions
- Send invitations: Importing a user does not send an invitation. Use Send Invitation Email from the Users list when the user needs to sign in. Never send passwords manually.
- Configure preferences: Set up any user-specific settings
- Enable 2FA: Set up two-factor authentication for admin users
Troubleshooting
Missing records can reflect source permissions, inactive accounts, company mapping, filters or synchronization. In the connection-page import, missing email skips that contact; an invalid nonblank email needs correction or clearing before confirmation. Other import screens may require missing emails to be supplied. If an account already exists, verify the identity and use linking where appropriate. If a role changes again after sync, review the provider’s role rules instead of repeatedly overriding the same field.Common Issues
Integration-Specific Notes
ConnectWise Manage
ConnectWise Manage
- Only active members are shown in the import list
- Users are synced by their Member ID
- Email addresses are pulled from the member’s primary email field
Halo PSA
Halo PSA
- Only agents (support staff) are available for import
- Client contacts are managed separately through company users
- Agent status must be active in Halo PSA
Autotask PSA
Autotask PSA
- Resources (technicians) are available for import
- Resource must have an active status in Autotask
- Email synchronization uses the resource’s primary email
Syncro
Syncro
- Technicians are available for import
- User must be active in your Syncro account
- Ensure API permissions include user read access
Microsoft 365
Microsoft 365
- Available when importing company users
- Syncs users from your connected M365 tenant
- Requires active Microsoft 365 integration per company
- To import matching users automatically after each sync, use an access rule. See Import Microsoft 365 users automatically
Frequently asked questions
Can the staff import dialog's Import Selected action also apply pending links?
Can the staff import dialog's Import Selected action also apply pending links?