

Company user administration is performed by the MSP. Company administrators request user or permission changes from their IT provider. A Company role does not grant access to MSP settings.
Choose a tab
Company Roles within the Roles tab are permission sets. Team Roles are a separate concept. Onboarding contact roles are also configured separately for the onboarding workspace.
Compare every role
The Permission Matrix sub-tab on the Roles tab shows every role at once, so you can see exactly what each role can reach without opening each one. Each row is a permission and each column is a role. The column header shows how many active users hold the role.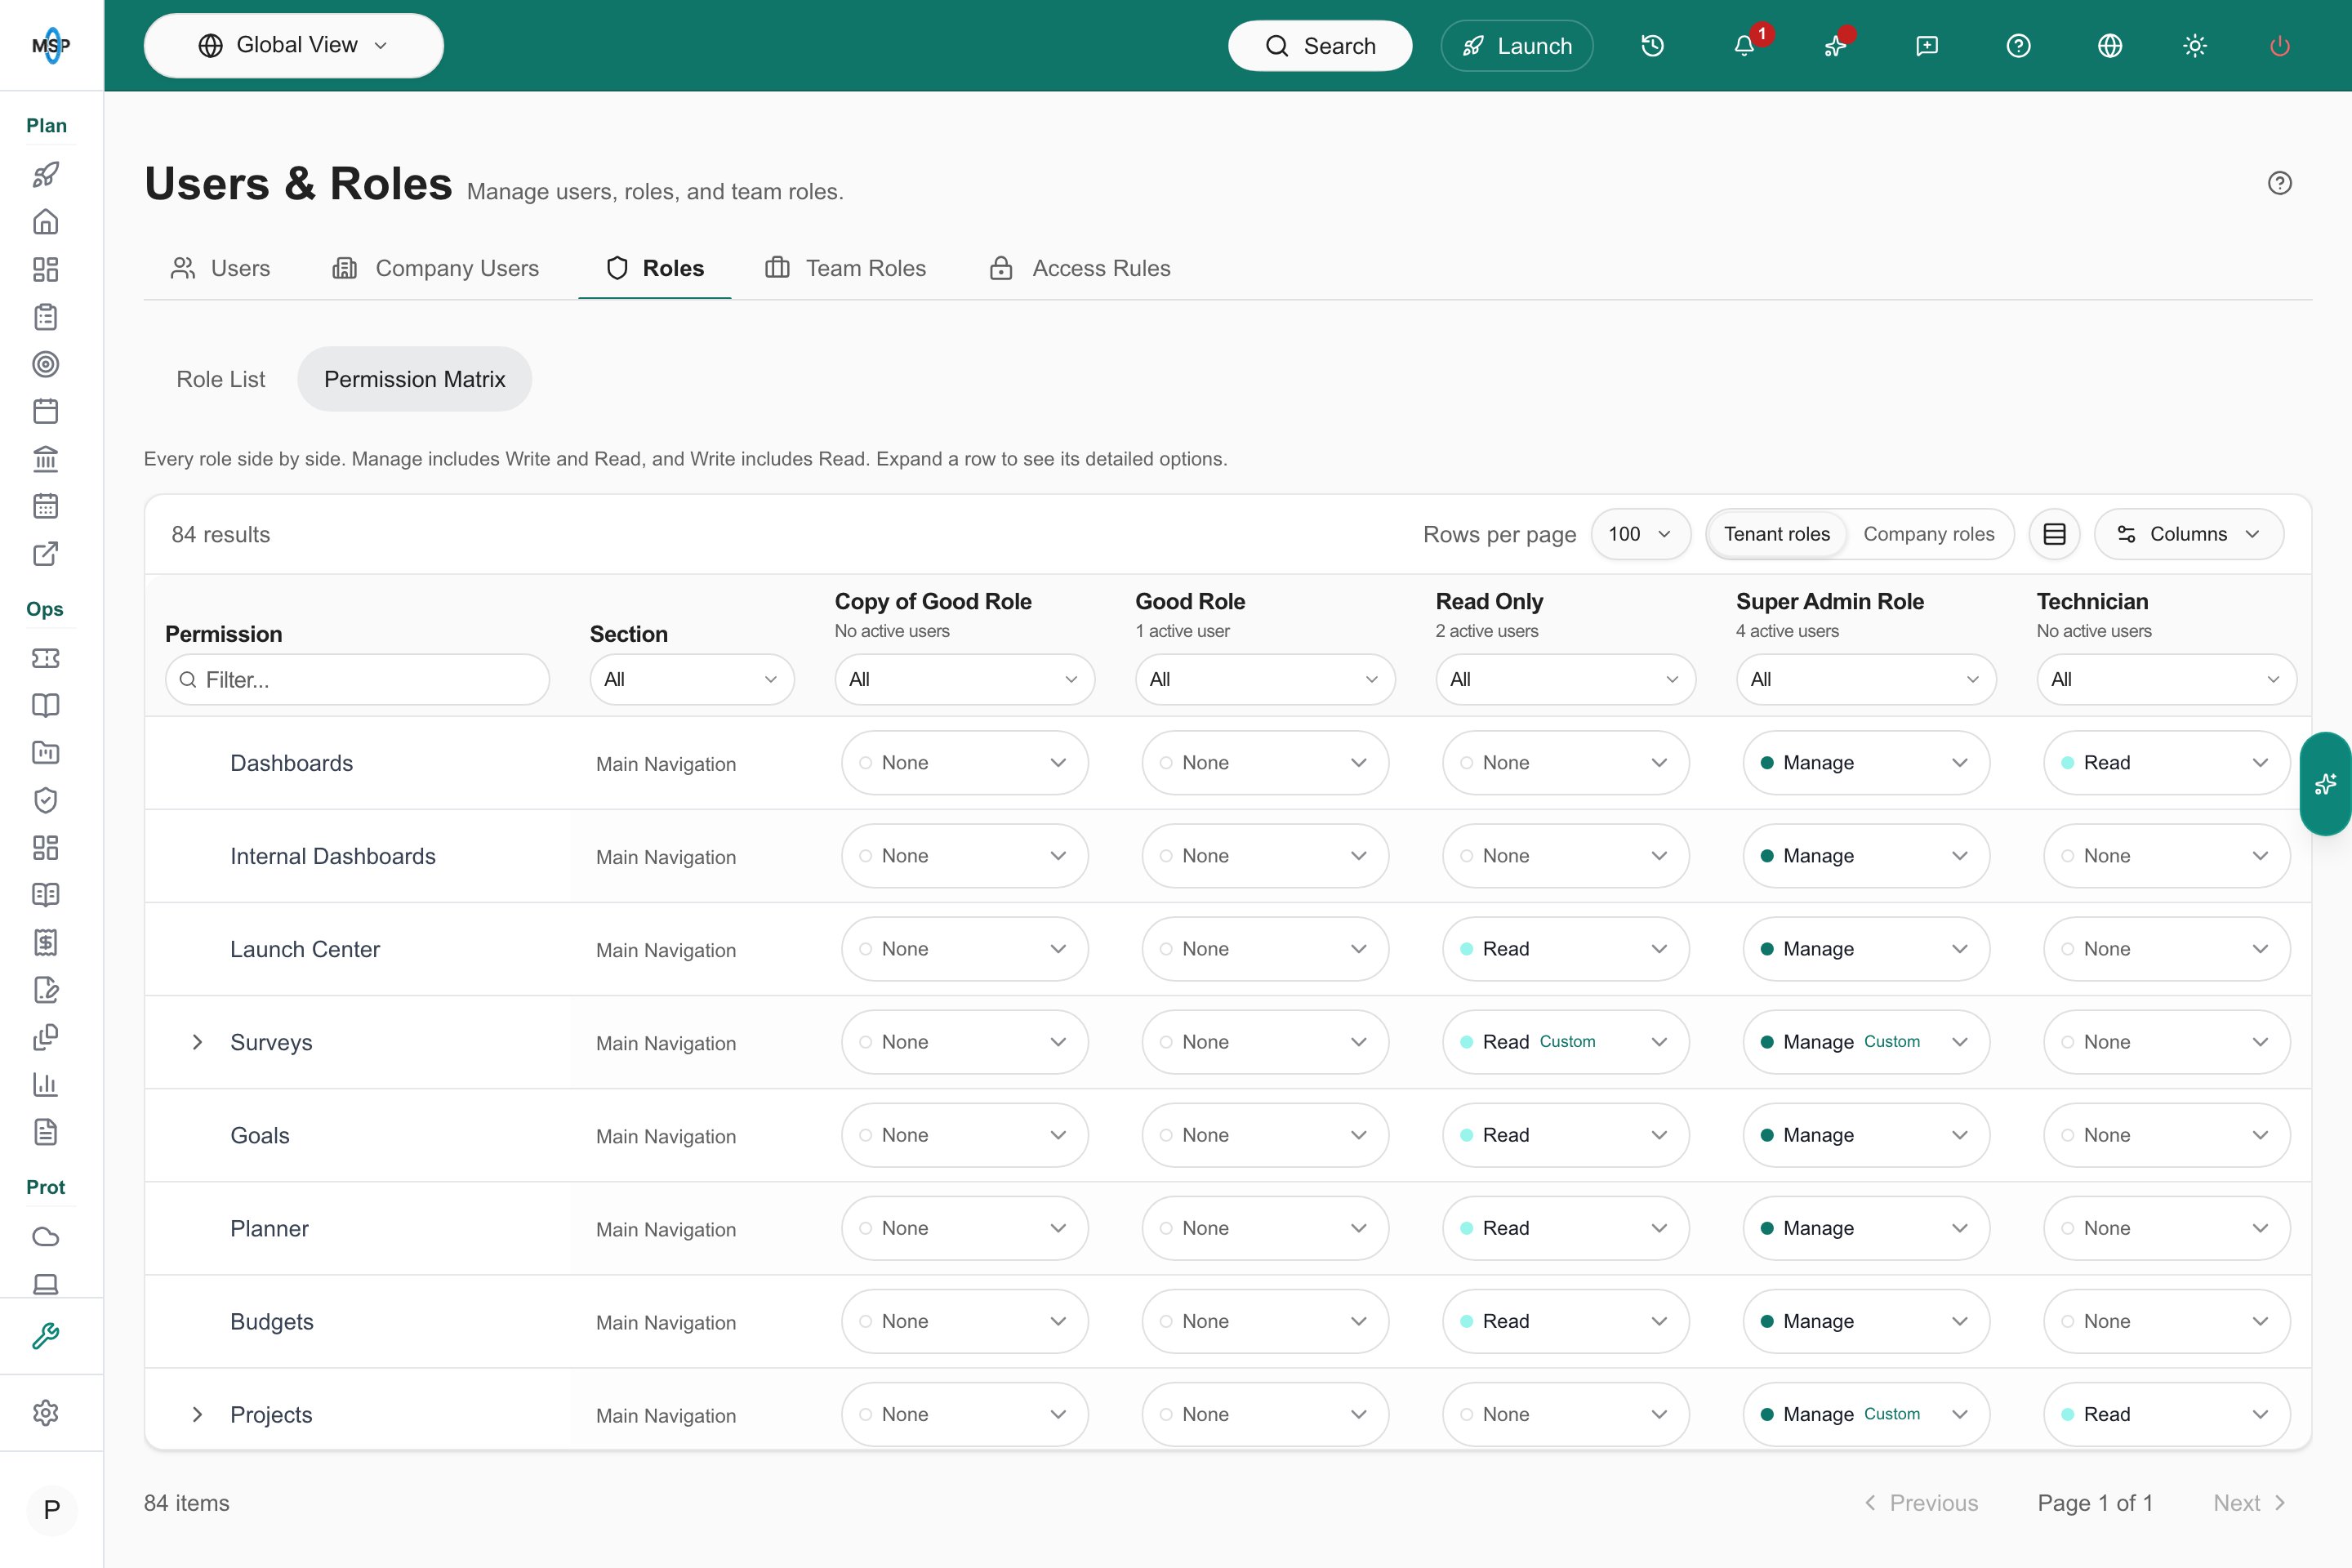
Permission Matrix for Tenant roles in MSPortal Demo.
- Open Settings > Users & Roles > Roles, then select Permission Matrix.
- Choose Tenant roles or Company roles.
- Read each cell as the role’s access level. Manage includes Write and Read, and Write includes Read.
- Select the arrow beside a permission such as Projects to see its detailed options, like which project views a role can open.
Change access from the matrix
If you can edit roles, each cell is a control:- Change the level in a cell, or tick a detailed option in an expanded row. Edited cells are outlined.
- Repeat for any other roles. Nothing is saved yet.
- Select Save changes to save every edited role, or Discard to drop the edits.
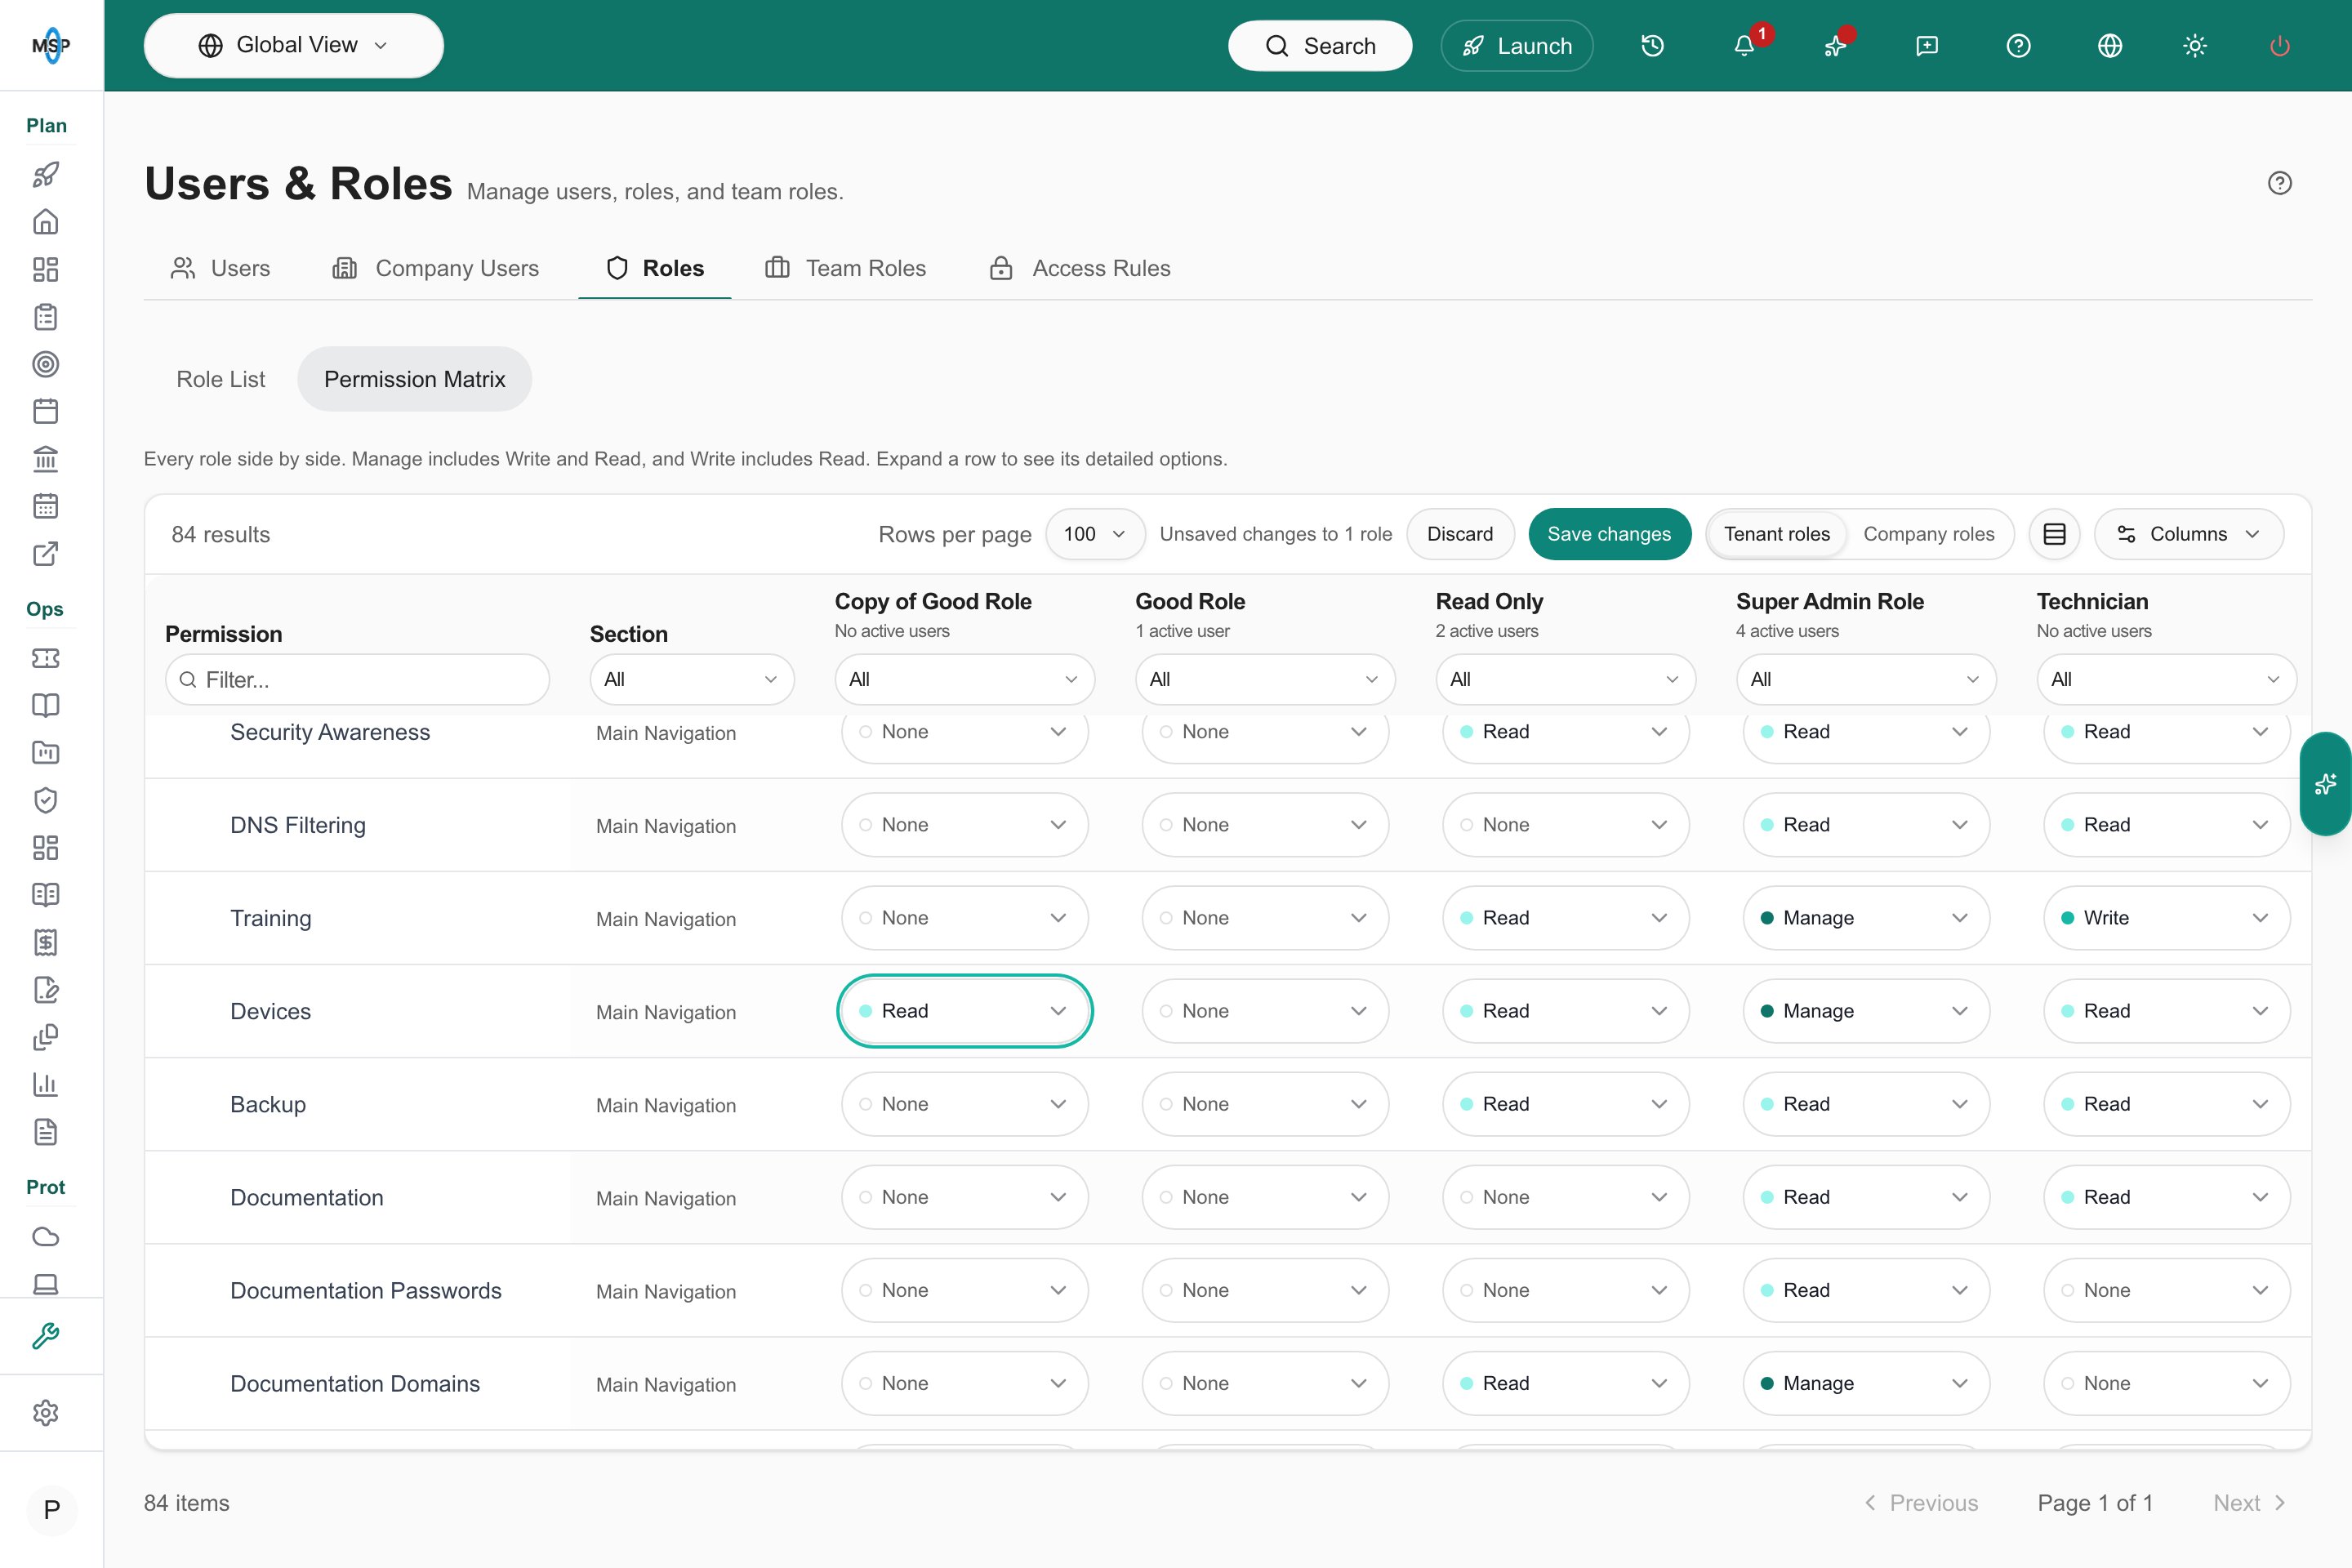
An unsaved change to one role, outlined, with Save changes and Discard in the toolbar.
Global team roles and membership automation
The Global Team Roles guide previews assigning the same staff across companies, preserving company-specific exceptions, and automating additions or removals. This feature is a branch preview and is separate from permission-role administration.Change access
- Change a Company user’s permissions: assign a different Permissions Group to one user or a selected set of users.
- Create and edit permission roles: define what the role permits, duplicate a starting role, or import a preset.
- Understand your own access: view your role and access information in your personal settings.
Work with user lists
Choose the correct user type before looking up a person. Confirm their name, email, and company, where applicable. Table filters and the current company scope affect which Company users appear. Selection actions operate on the selected users. Review the count and whether the selection includes matching results across multiple pages before applying a bulk action. An error can report partial completion; verify the affected records before retrying. Invitation emails, user role assignments, permission-role definitions, and account removal are separate operations. A role change does not send an invitation or create missing company data. Clearing a Permissions Group does not delete the user record.Check feature availability
Permissions determine allowed actions, while other settings determine what data or features are available. When a user cannot do something, check:- Their user type and saved role assignment.
- The permissions in that role, including the specific action they need.
- Their company scope and any record-specific visibility.
- Whether the module and required provider integration are configured.
- Any restriction shown by the workflow itself.
Frequently asked questions
Which tab manages employees at my customer companies?
Which tab manages employees at my customer companies?
Company Users. Users contains MSP staff accounts.
Where do I change the permissions inside a Company permissions group?
Where do I change the permissions inside a Company permissions group?
In Roles > Company Roles. To assign an existing group to a particular user, edit the user’s Permissions Group in Company Users.
Why is a cell read-only in the Permission Matrix?
Why is a cell read-only in the Permission Matrix?
Viewing roles and editing them are separate permissions. Tenant roles need write access to roles, and Company roles need write access to Company users.
Why can I see one settings tab but not another?
Why can I see one settings tab but not another?
User, role, and Company-user administration have separate permissions. Ask the MSP administrator to review the administrative access needed for your task.
Does Company Admin mean the customer can manage users?
Does Company Admin mean the customer can manage users?
No. The MSP manages Company users and permissions. The role name describes a Company permission set, not MSP administrator status.
Does an Administrator role make an account Primary Admin?
Does an Administrator role make an account Primary Admin?
No. The Primary Admin account flag is separate from the role’s name and permission definition.
Why was a Company user disabled automatically?
Why was a Company user disabled automatically?
MSPortal disables a Company user when the connected systems show they have left:
- Microsoft 365: every Microsoft 365 account linked to the user has sign-in blocked. This applies even if their PSA contact is still active.
- PSA: their contact is marked inactive in ConnectWise, Autotask, or Halo PSA, and they have no other active contact.
Can I use a Team Role instead of a permission role?
Can I use a Team Role instead of a permission role?
No. Team responsibilities and permission-role assignments serve different purposes. Use Tenant or Company permission roles to define portal access.