

Before you start
- You are MSP staff with permission to manage integrations. Company users cannot set this up.
- You have admin access to ConnectWise Asio.
- Your companies already exist in MSPortal, usually from your PSA integration. Asio companies are mapped to those existing companies.
- ConnectWise PSA keys do not work here. Asio uses its own API Client ID and Client Secret.
The first sync can take hours, or even days, for a large account. Companies appear on the Map step as they sync, and devices appear in staging as the sync progresses.
Create API credentials in Asio
1
Open API Access
Sign in to ConnectWise Asio as an admin and go to Integrations > API Access.
2
Add an API key
Select Generate API Access (or + Add if you already have keys) and enter MSPortal as the API Key Name.
3
Choose the scopes
Grant these scopes.
4
Save and copy the credentials
Select Save. Copy the Client ID and Client Secret now. Asio does not show them again after you close the dialog.
Connect Asio to MSPortal
1
Start the setup
In MSPortal, go to Settings > Integrations, find ConnectWise Asio and select Connect. To change an existing connection, select Configure on its row instead.
2
Enter the connection details
On the Connect step, fill in these fields.
3
Test the connection
Select Test Connection. A Connection tested successfully message means the credentials work. If it fails, check the environment, the Client ID prefix, the secret and the scopes.
4
Create the integration
Select Create Integration. A successful test alone does not save the connection. The secret is stored in encrypted vault storage.
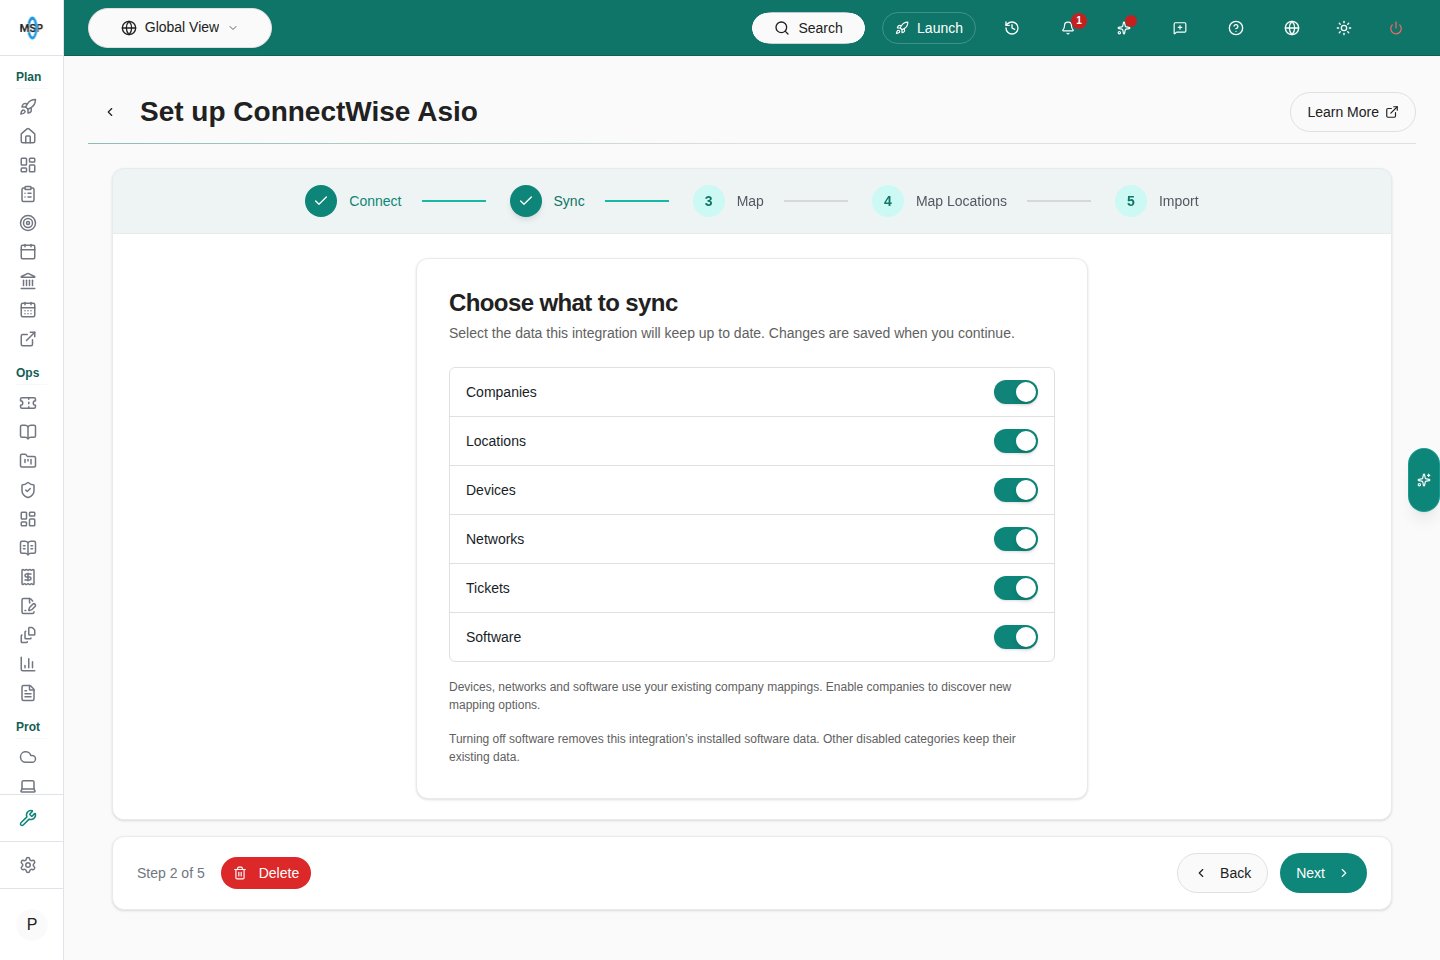
The Sync step with its data categories.
Map companies
1
Open the Map step
Continue to Map. The list shows each Asio company and whether it is mapped. Use the filter to show All, Mapped or Unmapped companies.
2
Match companies
Select Quick Match to suggest matches by name, then review each suggestion. For the rest, use Select company… on each row to pick the MSPortal company.
3
Save the mappings
Select Import Selected to save the pending mappings, check that the rows show saved links, then select Next. Next also tries to save pending mappings.
Map locations (optional)
1
Open Map Locations
Only locations for mapped companies appear. If you do not need location mapping, select Skip.
2
Match locations
Use Quick Match to suggest matches by name within each company, or pick a PSA location on each row. Manual picks and removals save immediately.
3
Save
Select Save All to confirm pending Quick Match suggestions, then continue.
Import devices
1
Open the import page
On the Import step, select Open Device Import. You can return later with the Import Devices action on the ConnectWise Asio row under Settings > Integrations.
2
Map device types
In Device Type Mappings, map each Asio device type to an MSPortal device type. Turn on Auto-Sync for types you want imported automatically. Select Ignore for categories you do not need.
3
Import the devices you want
In Staged Devices, select the devices and choose Import Selected.
4
Finish setup
Return to the wizard and select Complete Setup.
Manage an existing connection
1
Reopen the connection
Go to Settings > Integrations and select Configure on the ConnectWise Asio row. Use it to review mappings and imports.
2
Retest if needed
The environment and Client ID are locked. You can enter a secret and select Retest Connection, but this screen has no button to replace the saved secret.
3
Delete the connection (optional)
Select Delete Integration and read the confirmation. Deleting removes the connection and its settings. It does not revoke the API key in Asio, so remove that key in Asio yourself.
Troubleshooting
Frequently asked questions
Does Test Connection save the integration?
Does Test Connection save the integration?
No. After a successful test, select Create Integration.
Does Quick Match save every suggestion?
Does Quick Match save every suggestion?
No. Suggestions are pending until you select Import Selected (companies) or Save All (locations).
Does Complete Setup mean every device is imported?
Does Complete Setup mean every device is imported?
No. Device sync and import run separately. Open the device import page to check what was imported.
Can a company user set up Asio?
Can a company user set up Asio?
No. Setup is an MSP staff task.
Does Asio replace my ConnectWise PSA setup?
Does Asio replace my ConnectWise PSA setup?
No. Asio is the RMM connection. ConnectWise PSA has its own setup for tickets and company imports.