

Overview
Cisco Meraki is a cloud-managed networking platform for access points, switches, security appliances, cameras, and sensors. By integrating Meraki with MSPortal.ai, you can:- Sync network devices from all your Meraki organizations into MSPortal’s device inventory
- Map Meraki organizations to the correct MSPortal companies
- Assign Meraki networks to company locations so devices land in the right place
- Keep device details like model, serial number, firmware version, and IP address current
- Classify Meraki hardware into your own device types (firewalls, switches, access points, and more)
Prerequisites
- Cisco Meraki Dashboard account with organization admin access
- Dashboard API access enabled for your Meraki organization
- MSPortal.ai account with integration management permissions
Part 1: Generate a Meraki API Key
Before connecting to MSPortal.ai, you need a Meraki Dashboard API key.1
Log into the Meraki Dashboard
Access your dashboard at dashboard.meraki.com.
2
Enable Dashboard API Access
Go to Organization > Settings and scroll to the Dashboard API access section.Check Enable access to the Cisco Meraki Dashboard API and save.
If you manage multiple Meraki organizations, enable API access in each organization you want to sync.
3
Generate the API Key
Open your profile by clicking your account name in the top-right corner, then select My profile.In the API access section, click Generate new API key.
Newer Meraki dashboards also offer API key management under Organization > Configure > API & webhooks. Either location produces a valid key.
4
Copy the API Key
Copy the key immediately.
Part 2: Connect in MSPortal
You connect one API key for your whole tenant, then match organizations to companies and import devices. Go to Settings > Integrations, open the Directory tab, find Cisco Meraki, and select Connect. If Meraki is already connected, open it from the Active tab with Open instead. The connection page lists its tasks in the Setup guide. Under Setup you will find Connect, Choose data, Import or match companies, Locations (optional), Import devices, and Review. Under Manage you will find Overview and Sync activity. Select a task to open it.Connect
1
Enter the API Key
Paste your key into the API Key field.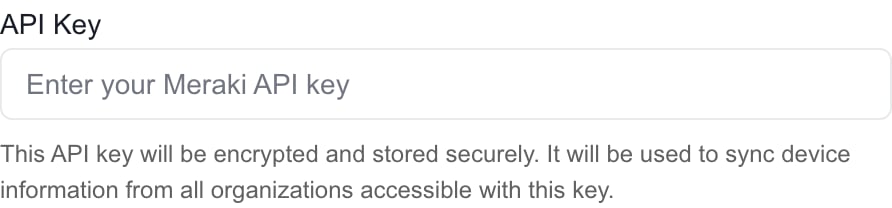
Credentials are stored in the vault and never shown again. The key is used to sync device information from all organizations accessible with it.
2
Test the Connection
Select Test connection. You will see Connection verified when the key works.If the test fails, check that the key was copied in full and that Dashboard API access is enabled for the organization.
3
Save the Connection
Select Save and continue to save the key. MSPortal saves the organizations the key can access so you can match them to companies.
Test connection does not save anything. If you change the key after testing, select Test again before you save.
Choose data
Meraki syncs all of its device data, so Choose data has no dataset switches. The task is done once the first sync has run. To start a sync now instead of waiting for the daily schedule, use Run sync in the connection header. The initial device sync may take an hour or two to complete.Import or match companies
Match each Meraki organization to an MSPortal company. Only devices from matched organizations are imported. The workspace is titled Import or match Cisco Meraki organizations.1
Review Suggested Matches
Open Suggested to see organizations MSPortal matched to companies by name. Select Accept to save a suggestion, or Change to choose a different company. Accept N strong matches accepts every suggestion with 90% confidence or more at once.
2
Match Remaining Organizations
In Import, the view the workspace opens on, choose the correct MSPortal company for each organization. If the company does not exist yet, select Import company. MSPortal creates the company right away, so check for an existing match first to avoid duplicates.
3
Check Your Matches
Review Matched. Accepting or choosing a company saves the match immediately. Remove match also takes effect immediately.
Locations (optional)
Use Locations to match each Meraki network to one of the matched company’s locations, so devices land in the right place. Accept a suggestion, choose a location, or select Create location to create one from the network and match it. Accept N suggested accepts all suggestions at once. Every change saves immediately. If no networks appear, match the organization to a company first.Import devices
Use Import devices to bring Meraki hardware into your device inventory. Every change saves immediately.- Under Match device types, choose the MSPortal device type for each Meraki type (appliance, switch, wireless, camera, cellular gateway, sensor, and others). For example, appliances usually map to Firewalls, switches to Switches, and wireless devices to Access Points. Use Match all suggested or Match the rest with AI to fill in types quickly.
- Turn on Auto-import for a type so future synced devices of that type import automatically.
- Under Staged devices, select Import all matched to import every device whose type is matched, or select rows and use Import N selected or Ignore N selected.
Devices only get a company when their Meraki organization is matched. If the list is empty, match your organizations first, then use Run sync.
Review
Open Review and select Finish setup once the required tasks are done. Finishing setup does not mean every device has synced or been imported. Check Import devices and your device inventory.Company-Level Setup (Optional)
In addition to the tenant-wide API key, individual companies can connect their own Meraki access and choose exactly which networks sync.1
Open the Company
Go to Settings > Companies and select a company.
2
Connect Meraki for the Company
Find the Device Integrations section and locate the Cisco Meraki card.Click Connect to authorize through Meraki’s sign-in popup, or choose Use API Key to enter a Meraki API key for this company.
3
Select the Organization and Networks
Choose which Meraki organization belongs to this company, then select the specific networks to sync.
4
Map Networks to Locations
Click Map Networks to Locations to assign each Meraki network to a company location. Devices are automatically associated with these locations when synced.
Locations must already exist in the company’s settings before they can be assigned to networks here.
5
Manage the Company Integration
From the company’s Meraki card you can also use Sync Now, Pause Sync / Resume Sync, and Remove Integration.
What Gets Synced
The Meraki integration syncs the following data to MSPortal:Organizations and Networks
- Organization names and dashboard links
- Networks within each organization, including their product types
Devices
Network hardware from matched organizations:- Device name
- Serial number
- MAC address
- Model
- Firmware version
- IP address
- Product type, classified into your MSPortal device types
Synchronization Schedule
After initial setup, data syncs automatically:
Each integration syncs at most once every 24 hours on the schedule. Manual syncs are not limited by this interval. Saving a new API key on an existing connection lets the next scheduled run sync even if one ran in the last 24 hours.
You can trigger a manual sync at any time with Run sync in the Cisco Meraki connection header, or Sync Now on a company’s Meraki card.
Managing Your Integration
After setup, open the Cisco Meraki connection from the Active tab in Settings > Integrations. Select any task in the Setup guide to return to it.
Disconnect… removes the stored API key, the matches between Meraki organizations and companies, and synced data. It does not revoke the key in Meraki.
Your tenant has one active Meraki connection. Organizations from every Meraki account you manage must be reachable with that one key.
Replacing the API Key
1
Open Connect
Open the Cisco Meraki connection and select Connect in the Setup guide. A stored key shows as masked.
2
Enter and Test the New Key
Paste the new key into the API Key field and select Test connection. Leave the masked value unchanged and select Test connection if you only want to test the stored key.
3
Save the Key
Select Save changes to store the new key. Testing alone does not save it.
Troubleshooting
Frequently Asked Questions
Does Test connection save the integration?
Does Test connection save the integration?
No. For a new connection, test the key and then select Save and continue. For an existing connection, select Save changes to store a new key.
Are suggested matches saved automatically?
Are suggested matches saved automatically?
No. Suggestions wait for your review. Accepting a suggestion saves its match immediately; removing a saved match also takes effect immediately.
Does Finish setup mean all devices are imported?
Does Finish setup mean all devices are imported?
No. Device sync, saved matches and device imports have separate results. Check Import devices and the resulting inventory.
Will one key expose every Meraki organization to every client?
Will one key expose every Meraki organization to every client?
No. The key decides which organizations MSPortal can discover. Saved organization-to-company matches and portal permissions decide which company sees each device.
Security & Privacy
- API Key Storage: Your Meraki API key is encrypted and never exposed in logs or responses
- Data Isolation: All synced data is tenant-isolated and only visible to your organization
- Read-Only Usage: MSPortal only reads device and network information; it never changes your Meraki configuration
Next Steps
After setting up the Meraki integration:View Devices
Browse the synced network hardware in your device inventory
Import Devices
Learn how device imports work across integrations
Sync Schedules
See when each integration refreshes its data
Other Integrations
Explore additional integration options