Use Training settings to choose which courses your clients can take, set the branding on training certificates, and add your own courses. This page is for MSP staff.

Before you start

  • To enable or disable courses and change certificate branding, you need Training settings write access and active billing.
  • To use Create Course, you need the Manage Training permission and active billing. Training settings access alone does not give you this.
  • Premium courses use the Bigger Brains catalog. They are enabled only for companies that have Bigger Brains turned on in company settings. See Enable Training and Billing settings.
  • If your organization uses the direct Bigger Brains experience, Settings > Training does not appear and the page opens the Training module instead.

Enable or disable courses

1

Open Settings > Training

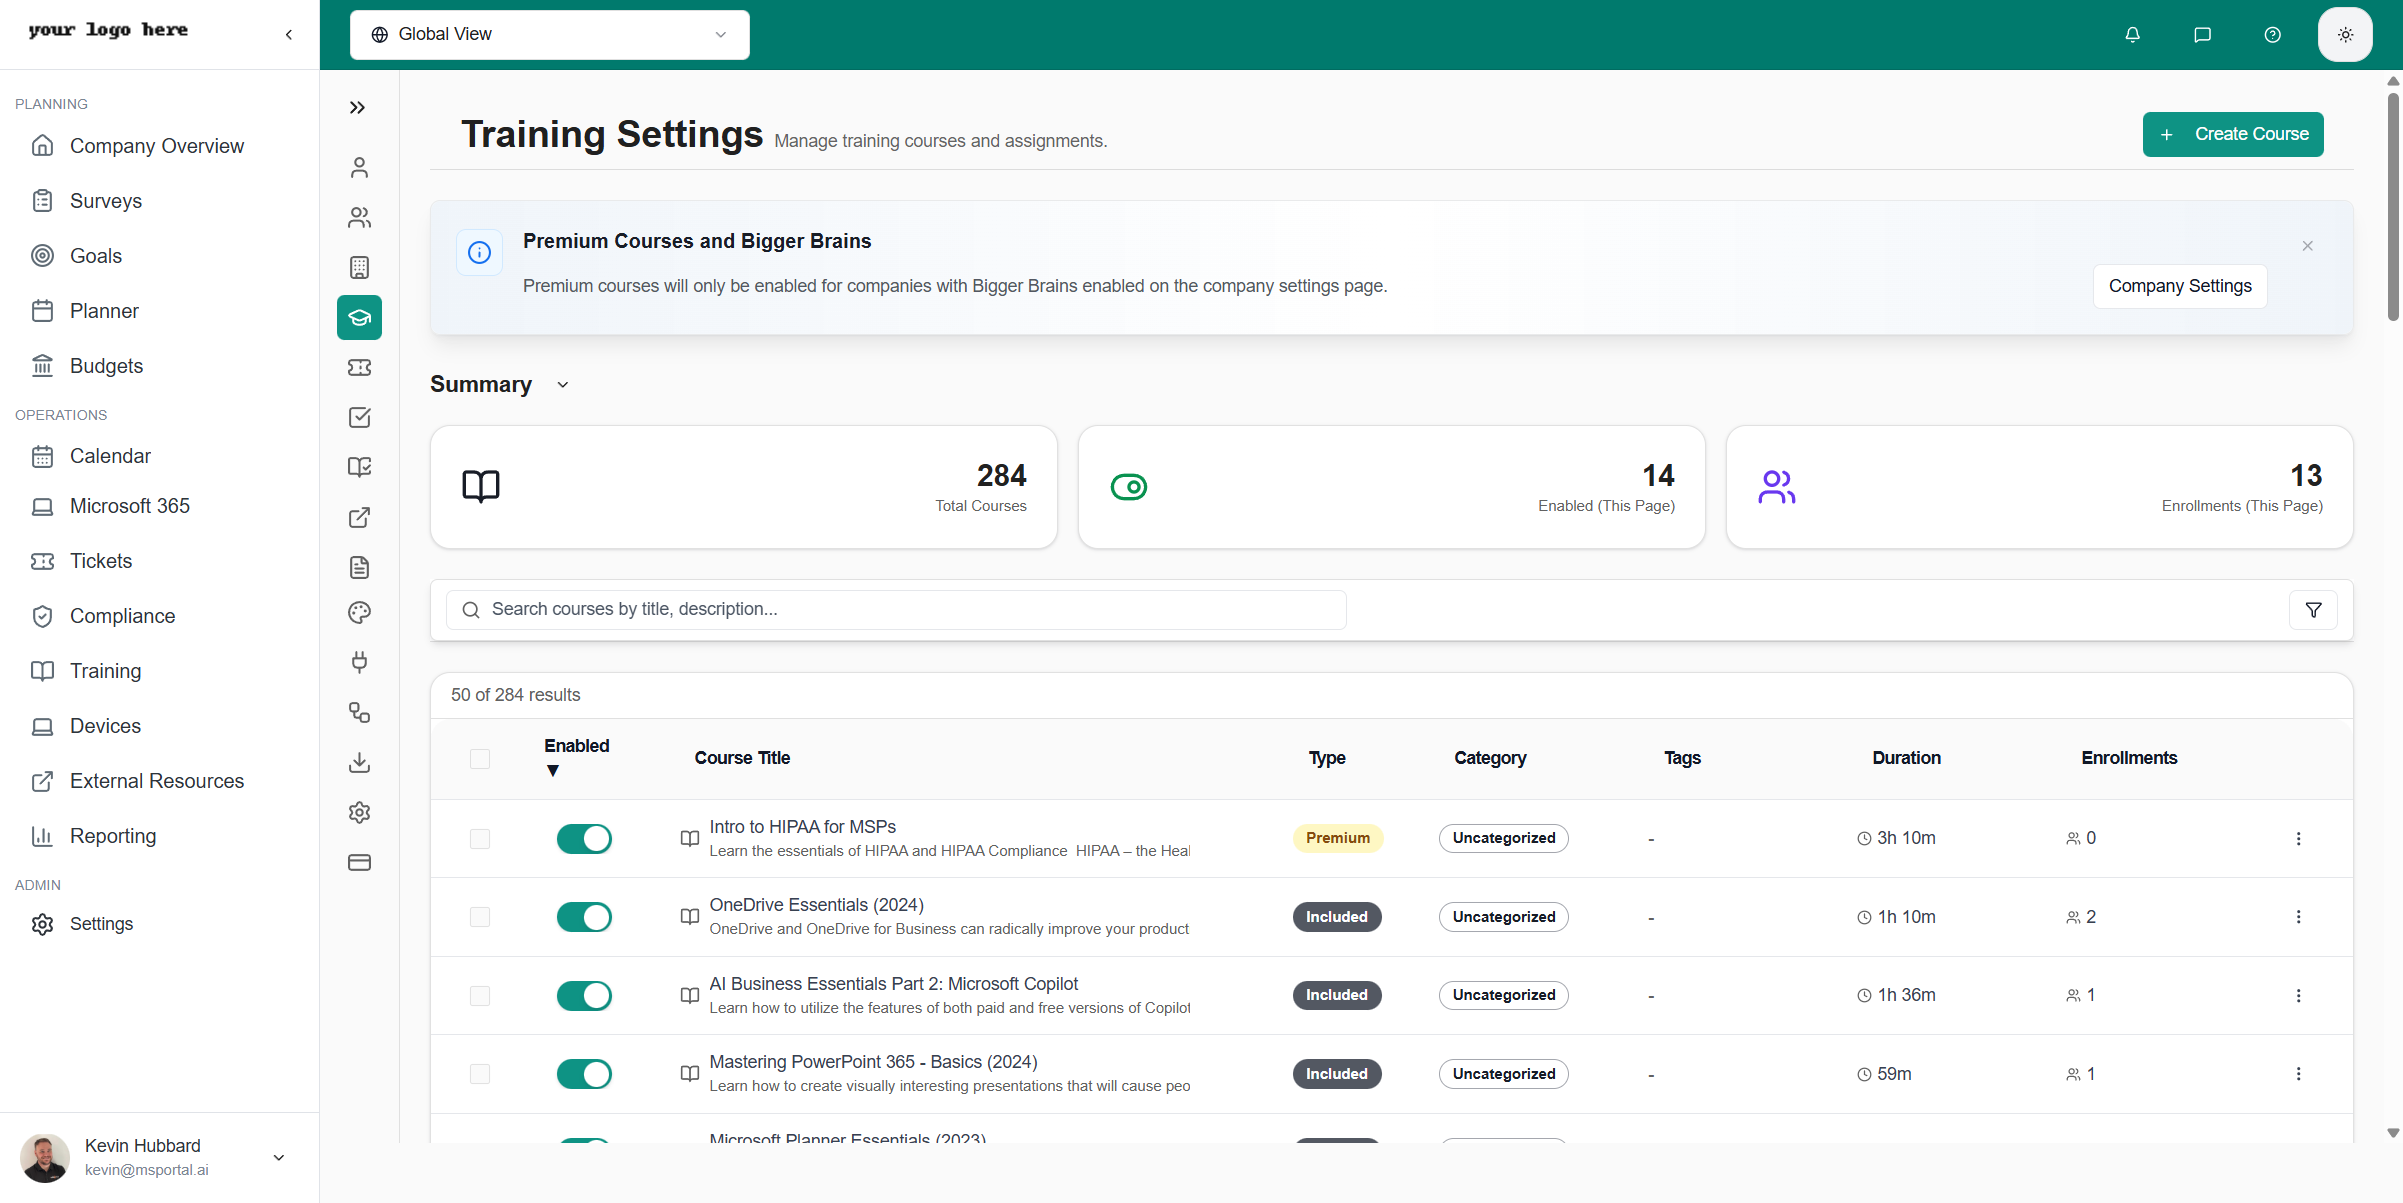
The course table lists every available course with its Enabled switch, Course Title, Type, Category, Tags, Duration and Enrollments. Type shows Included, Premium or Custom. Duration reads like 15m or 1h 30m.
Training settings course table with Enabled switches, Type, Category, Duration and Enrollments
2

Pick the company scope

The company selector sets who the change applies to. With one company selected, the change applies to that company. With no company selected, it applies to your whole organization.
3

Find the course

Use the search box and the column filters for title, Type, category, tags, Duration and Enabled.
4

Turn the course on or off

Click the Enabled switch, or open the row menu and choose Enable Course or Disable Course. The change saves immediately and a toast confirms it. There is no Save button.
5

Optional: change several courses at once

Tick the checkbox on each row, then use the bulk menu to choose Enable Selected or Disable Selected.
Custom courses that you created appear in the same table with the Custom type. They follow the company selector. A course with no company shows for everyone, and a course tied to one company shows when you select all companies or that company. Custom courses are always enabled, so their Enabled switch is locked on, their checkbox is disabled, and their row menu has no Enable Course or Disable Course. Preview Course and Manage Questions still work. Enabling a course makes it available. It does not enroll anyone. To assign courses, use Learning Paths or Find and enroll. Disabling a course does not delete enrollments. Check the learner’s course access before you assume an enrolled learner can still launch it.

Preview a course

1

Open Settings > Training

Find the course in the table.
2

Open the row menu and choose Preview Course

The course opens in a new tab in preview mode. A staff preview does not prove that a company user has access. Check availability and Premium access too.

Manage video questions

1

Open the row menu for a video course

Only video courses show Manage Questions.
2

Choose Manage Questions

The question editor opens in a new tab. Add your questions there, then open Preview Course to check the quiz.

Choose certificate branding

The Certificate branding card at the top of Settings > Training sets the name and logo printed on training certificates. It applies to all clients and ignores the company selector.
1

Open Settings > Training

Find the Certificate branding card.
2

Choose a branding option

Choose MSP branding to show your organization’s name and logo. Choose Client branding to show the learner’s company name and logo.
3

Click Save

The button stays off until you change the selection. Wait for Certificate branding saved.
With Client branding, a company without a logo shows its name instead. Learners who do not belong to a company keep MSP branding. The setting is read when a certificate is viewed, downloaded or shared, so it applies to certificates you already issued. With read-only access you see the current choice and no Save button.

Delete a custom course

1

Open the row menu

Find the custom course in the table and open its row menu. Only custom courses have Delete Course.
2

Choose Delete Course

A confirmation names the course and warns that enrolled learners lose access to it.
3

Confirm

Confirm to delete the course. It leaves the table and learners can no longer open it.
You need the Manage Training permission. Company users see Delete Course only on their own company’s custom courses, never on courses for your whole organization. You cannot undo a deletion in the app, and custom courses cannot be edited in the app after you create them. Included and Premium courses cannot be deleted.

Create a custom course

1

Open Settings > Training and click Create Course
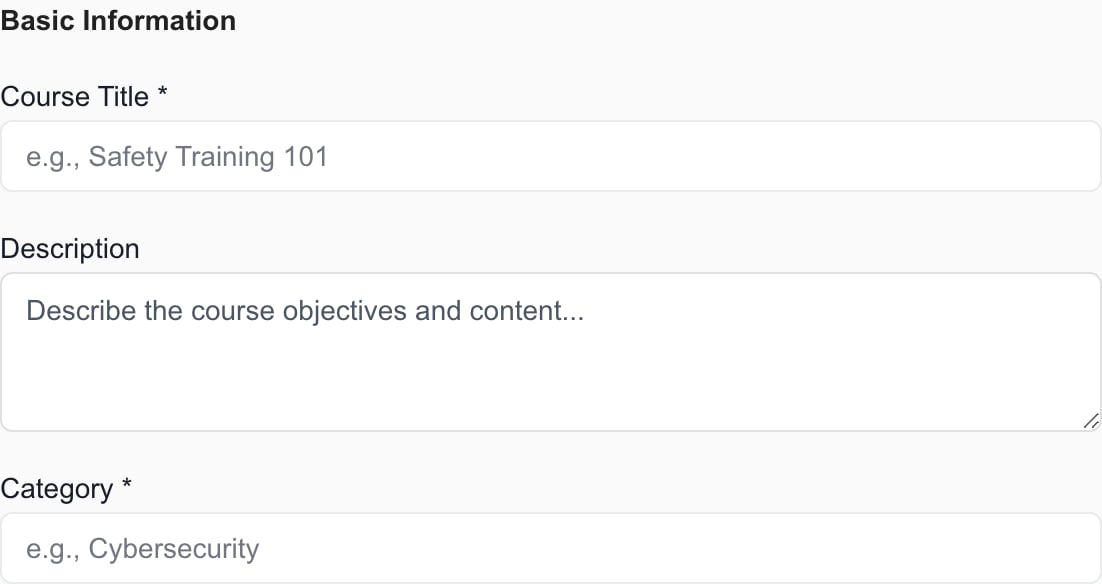
The button is at the top right of the page. The Add Training Course panel opens.
Create Course panel with the Basic Information fields
2

Fill in Basic Information

Enter a Course Title and a Category. Both are required. Add a Description if you like.
3

Choose the Course Type

Select SCORM Package, Video Course or Document.
4

Set Course Settings

Optionally set Duration (minutes), Passing Score (%), Max Attempts and Expires After (days). Turn on Make this course mandatory for all users if it must be completed.
5

Add the content

Use the input for your course type.
6

Click Create Course

The course is created and its content uploads. Cancel closes the form without saving.
7

Check the new course

Find it in the table with the Custom type and open Preview Course to check the content before you assign learners. Its duration shows as you entered it, for example 15m.
The create form has no company field. If exactly one company is selected in the company selector when you click Create Course, the form says the course is for the selected company only, and the course is scoped to that company. With no company or several companies selected, the course is created for your whole organization.

Troubleshooting

Frequently asked questions

No. Certificate branding is one organization-wide choice. With Client branding, each certificate uses its learner’s company.
No. Availability and enrollment are separate. Use learning paths or enrollment to assign learners.
No. They save immediately for the company scope you selected.
No. Create Course needs the Manage Training permission and active billing.
Yes. The course is created first and its content uploads second. Find the course before you try again.
Yes, when exactly one company is selected as you click Create Course. The form then says the course is for the selected company only. With no company or several companies selected, the course is for your whole organization.
No. Custom courses are always enabled and have no switch. To remove one, use Delete Course in its row menu.
No, but do not rely on it as a cleanup step. Check the learner’s actual access.